Friday, September 5, 2008

Clockwork Comics Summer 40k Tournament Game 7

I've slacked on getting this done in a timely manner however this would be my week 7 of the LGS Clockwork Comics gaming Tournament that I played in. As this is over a week old it may end up being short, however its going to be good to look at for anyone who played Nids or plays against them as the Dark Angels player used a cool tactic that I didn't foresee coming.

General information:

Tyranid List-

HQ - Hive Tyrant Winged Scything Talons
HQ - Hive Tyrant Walking Dakka-Tyrant

Elite - Carnifex BS TL-Devourers
Elite - Warriors 3 with Deathspitters and one with Barbed Strangler

Troops - Genestealers Acid Maw Scuttlers
Troops - Gaunts Spinefists WoN

Heavy Support - Carnifex Barbed Strangler Venom Cannon BS

Total: 2000 Points

Dark Angel List -

HQ - Master of the Ravenwing on Landspeeder

Elite - Scouts with Sniper Rifles

Troops - 10 Man Spacemarine Squad split into two Combat squads
Troops - Ravenwing Squadron Split into Combat Squads
(One squad had Multi-meltas and one had Flamers on the bikes)

Heavy Support - Devastators with Heavy Bolters
Heavy Support - Vindicator
Heavy Support - Whirlwind

Deployment:

Going into the game we designed our lists knowing it was a 2000 point Pitched Battle Seize 
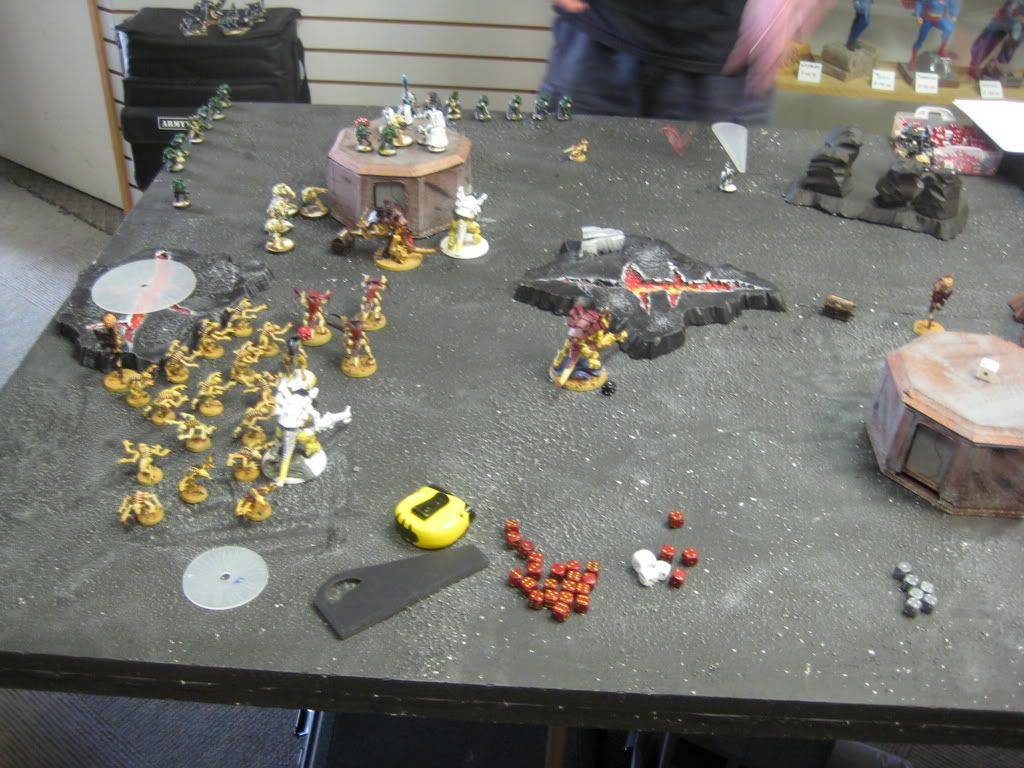
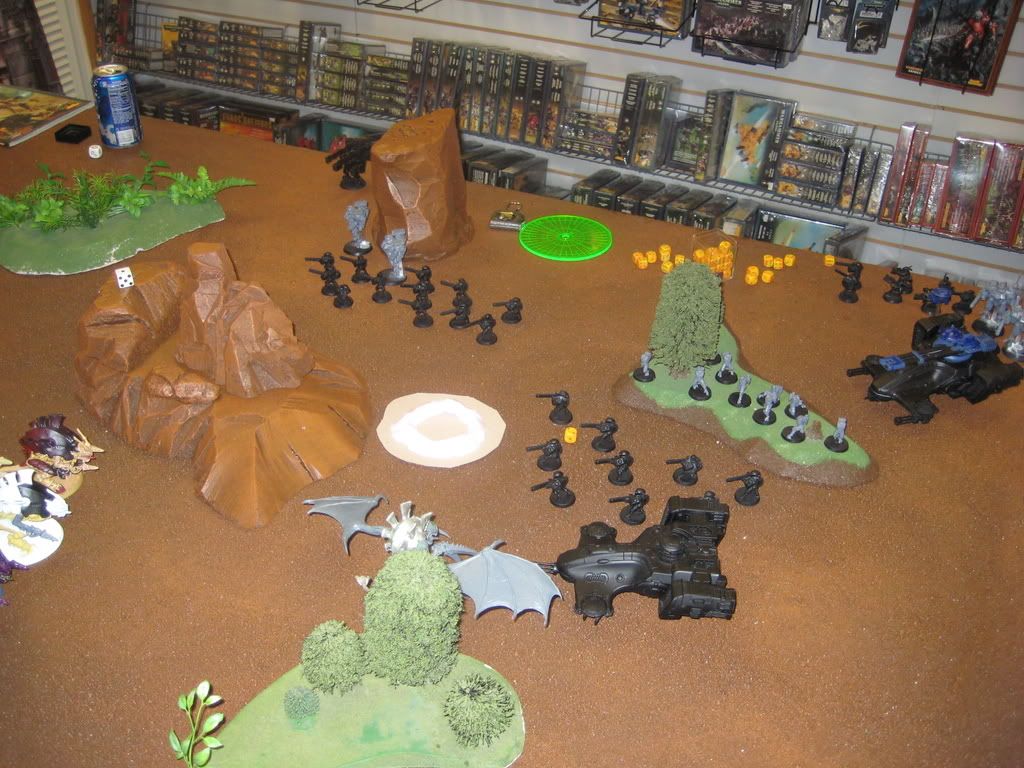
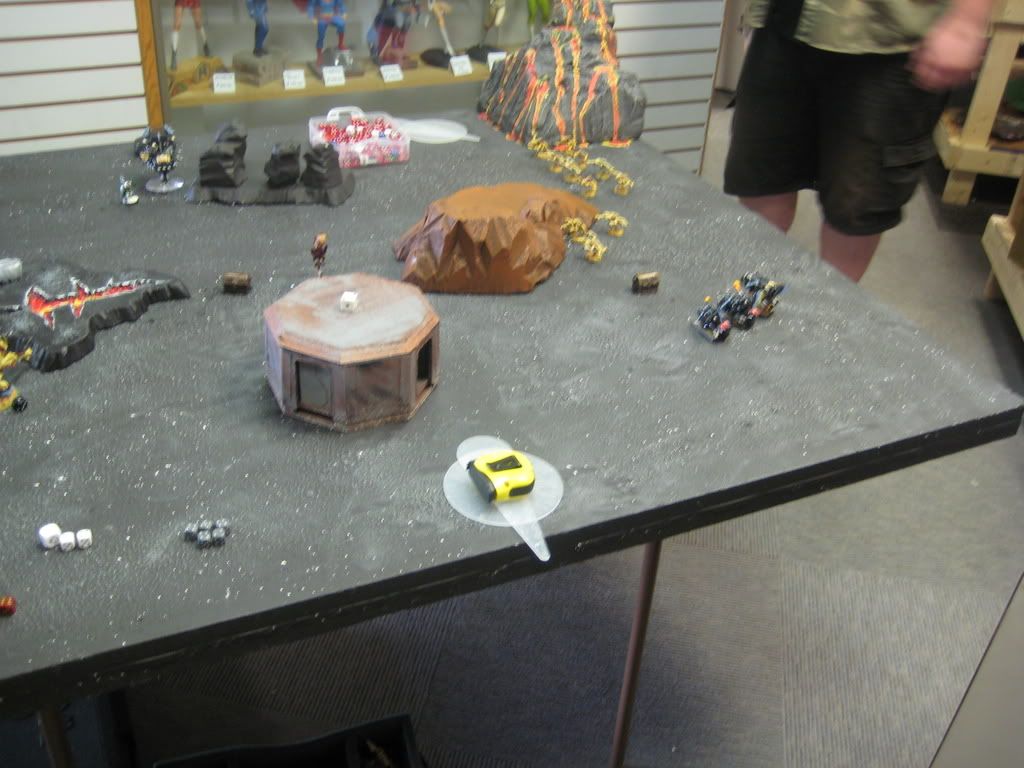
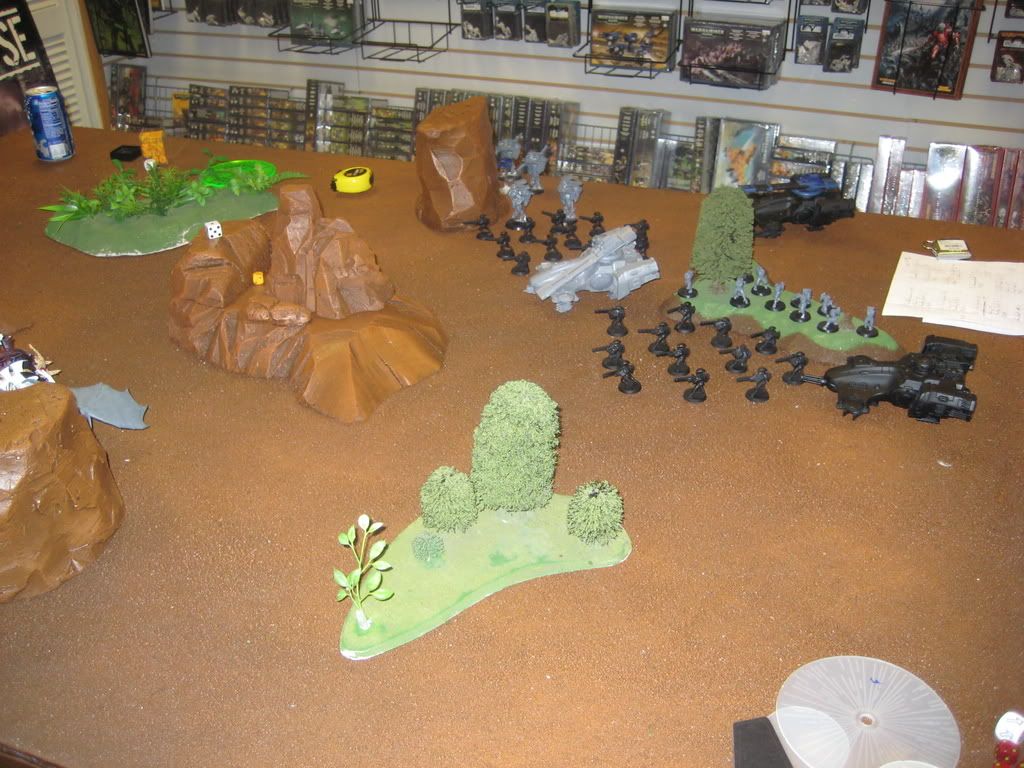
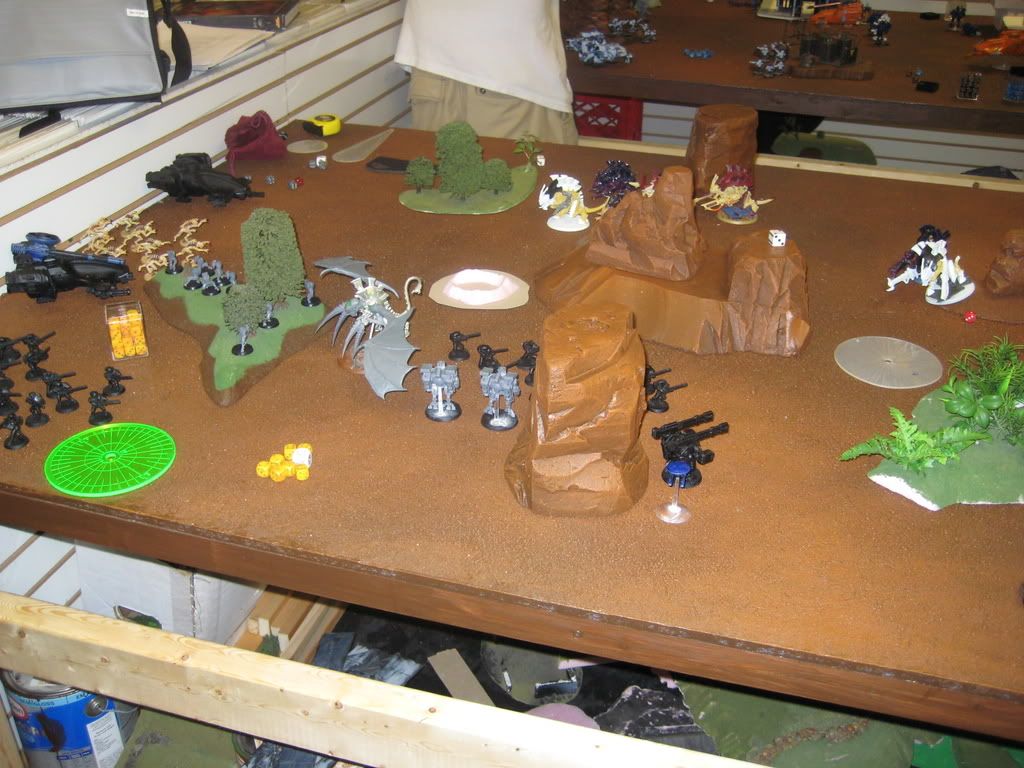
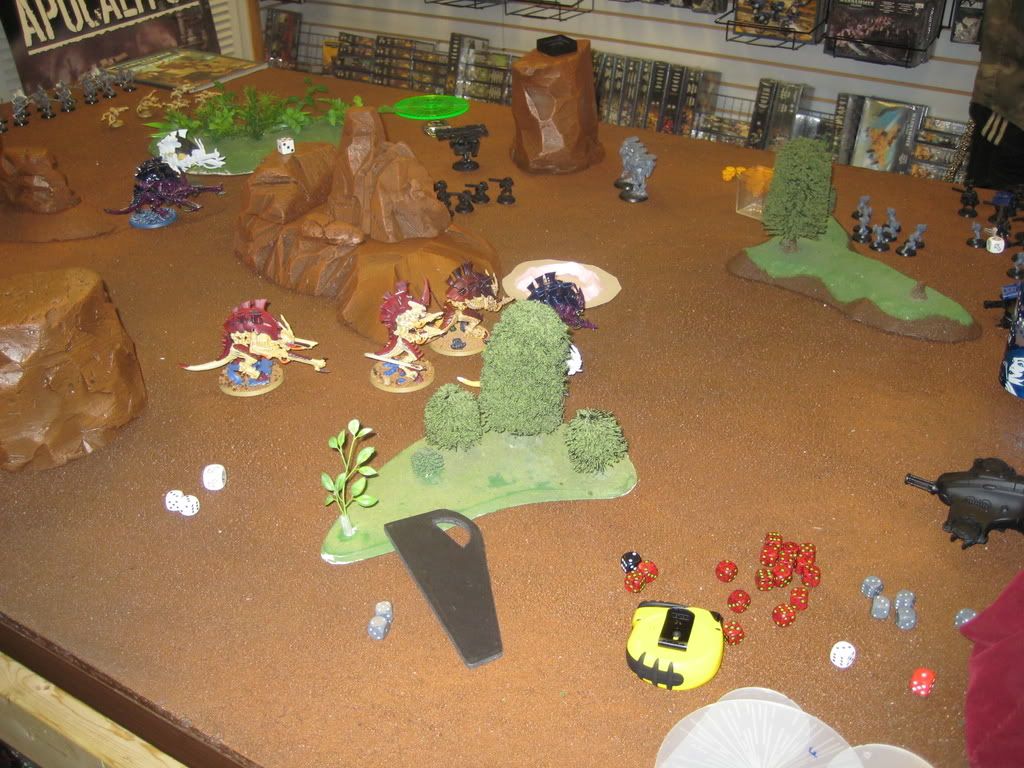
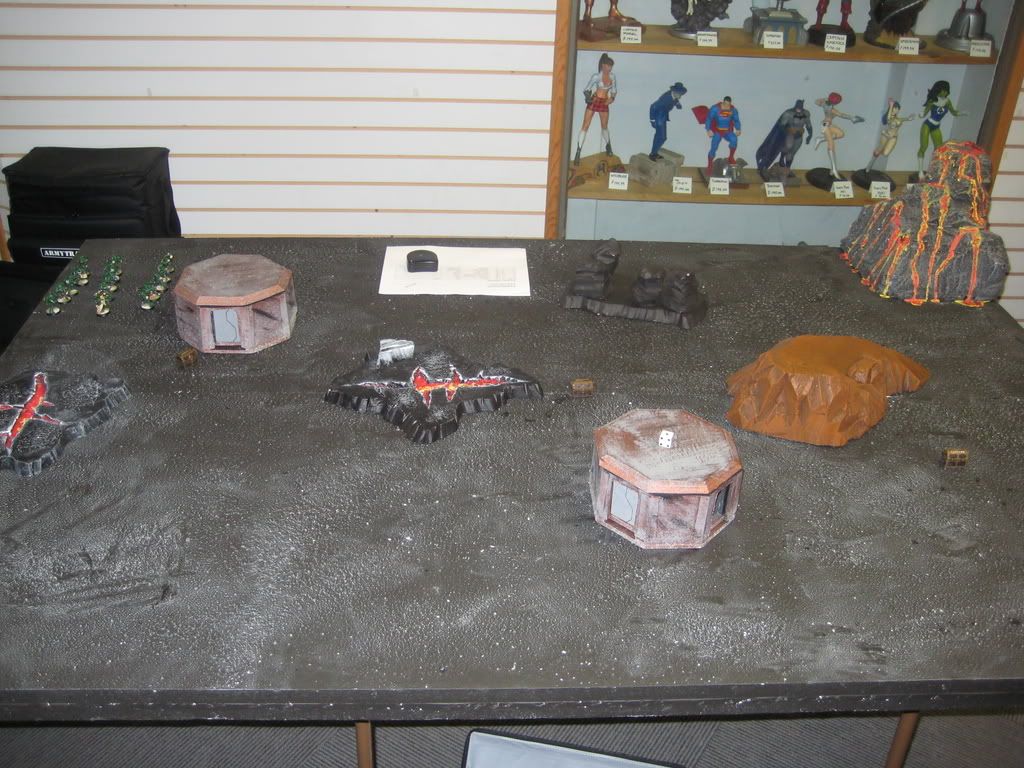
Ground (I get the two Objective games mixed up so It could be the other one). When we found out we were facing each other my opponent was excited as he knew my army and had a plan that he was discussing previously with his Son who also was in the tournament, more on that later. We chose his table that he brought to the game store and started setting up terrain. Unknown to me he had a particular plan and as he started placing "Impassible" terrain on the board I should have seen the Idea. Along the entire middle of the board he placed Impassible terrain one on each side and one in the middle so I ended up with two gaps I could travel through. I filled the rest of the board with random things to keep it looking sort of even and with no real plan other than to add things that blocked LOS.


As for the actual deployment. I do believe I won first turn and handed it over as to see how he 
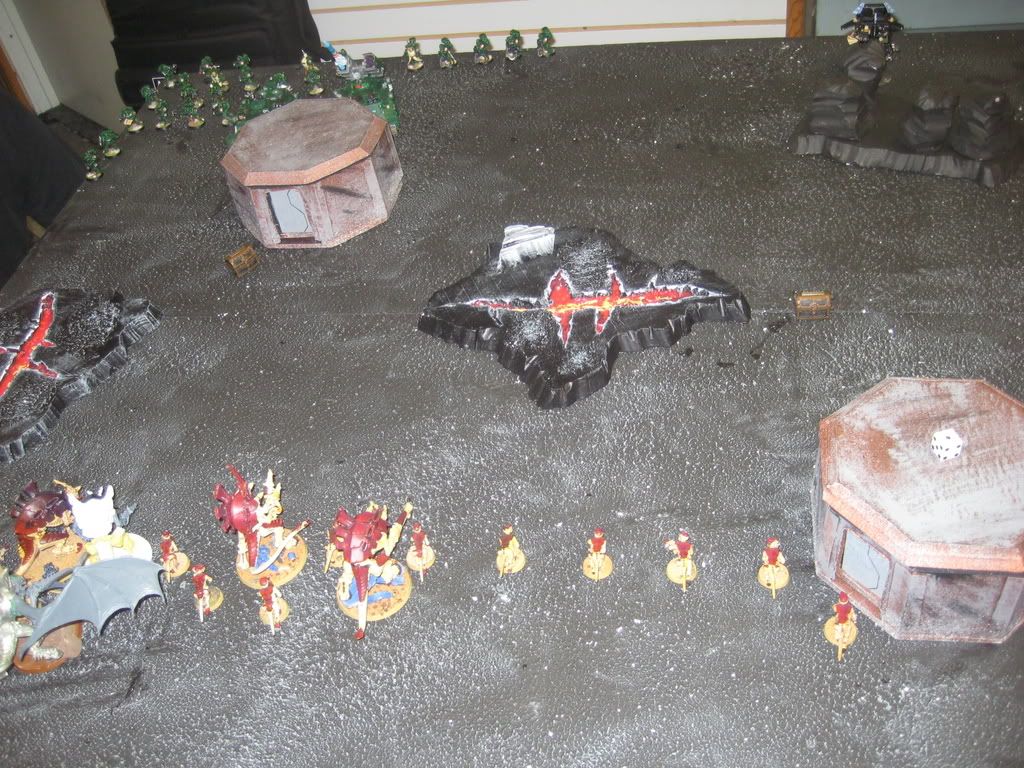
deployed counter it and then hope to "seize the initiative". It worked in I got to see his deployment but I didn't end up with first turn. The Dark angel deployment was for the most part all in one corner of the board. All of his troops were basically lined up against the edge of the board. His 
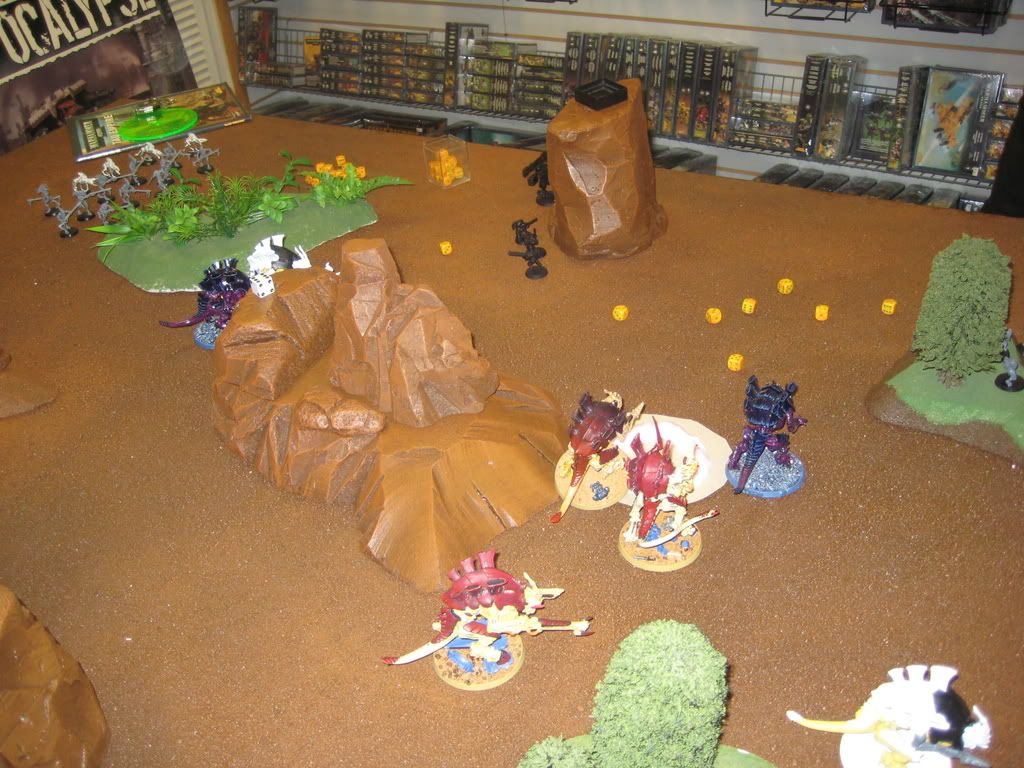
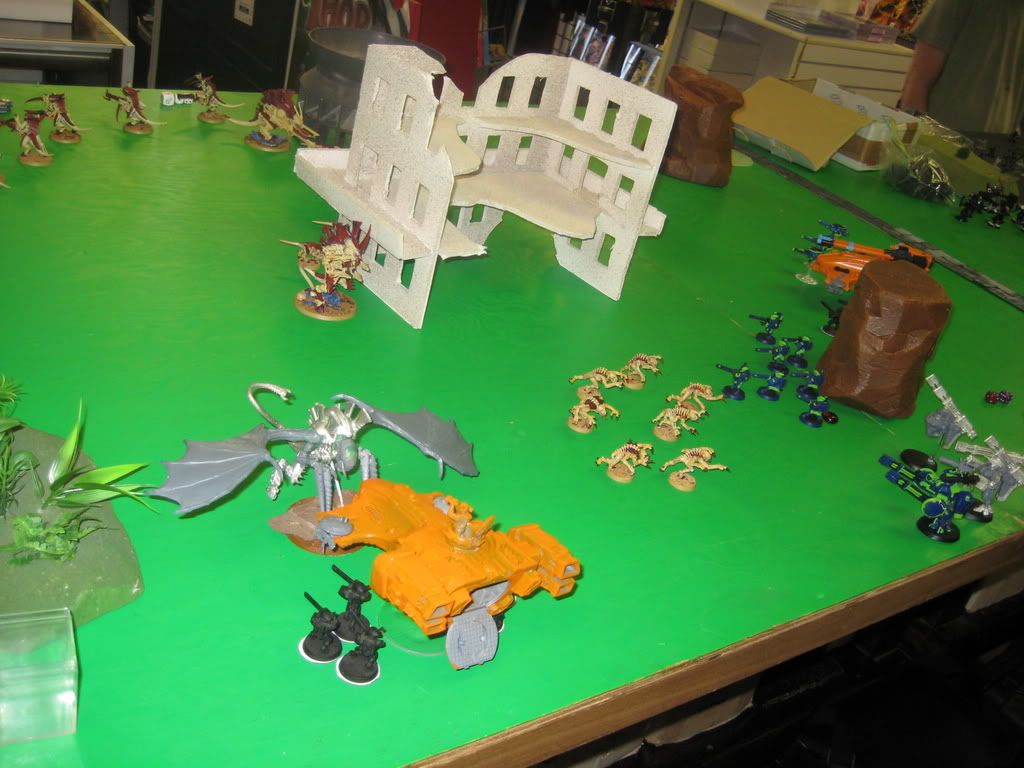
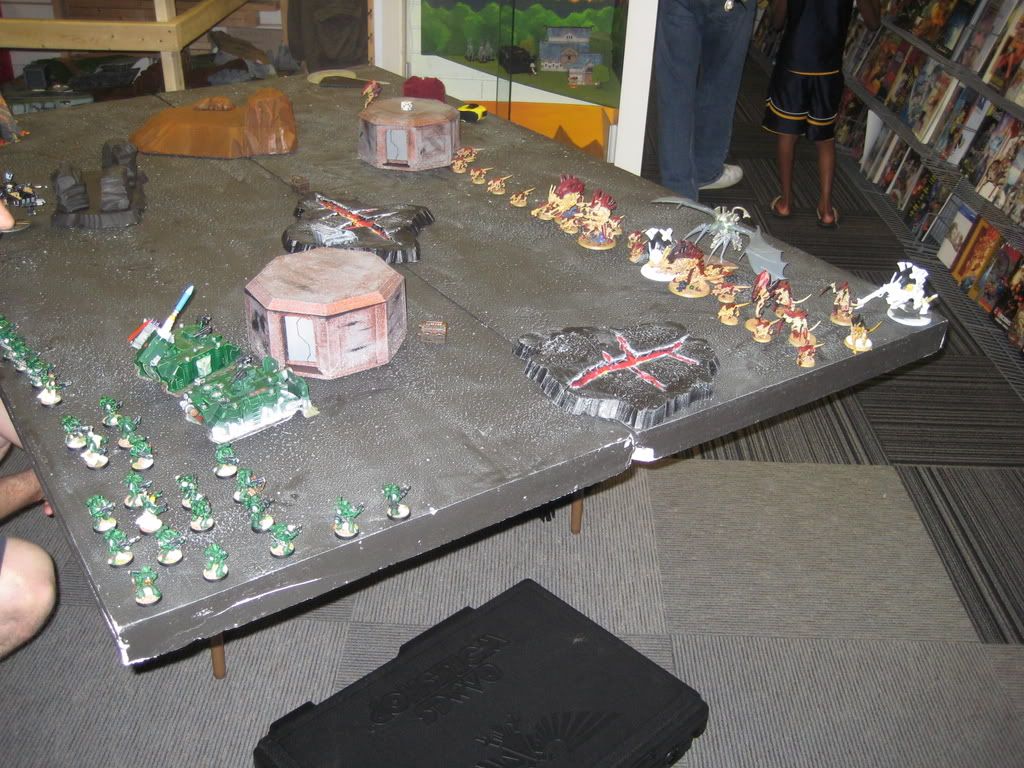
Vindicator in LOS of a good portion of the board, the Whirlwind hiding behind a one of the bunkers, and the Devastator squad chilling out in back covering the middle of the board. I deployed across from him with a screen of gaunts across the front and the important MC creatures out in front so they were as close as possible. He also had Infiltrators, Scouts with Sniper Rifles, that he placed after me in the middle of the board but decently far away. His idea was to rend the hell out of my MC's that he could see.

Turn One:
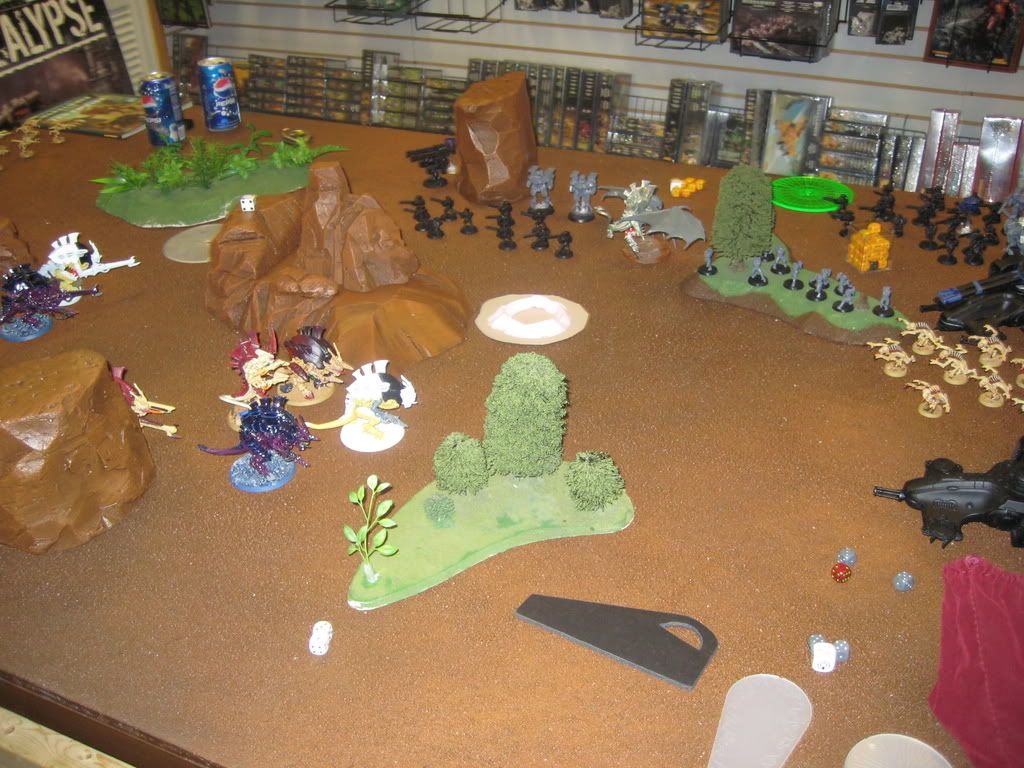
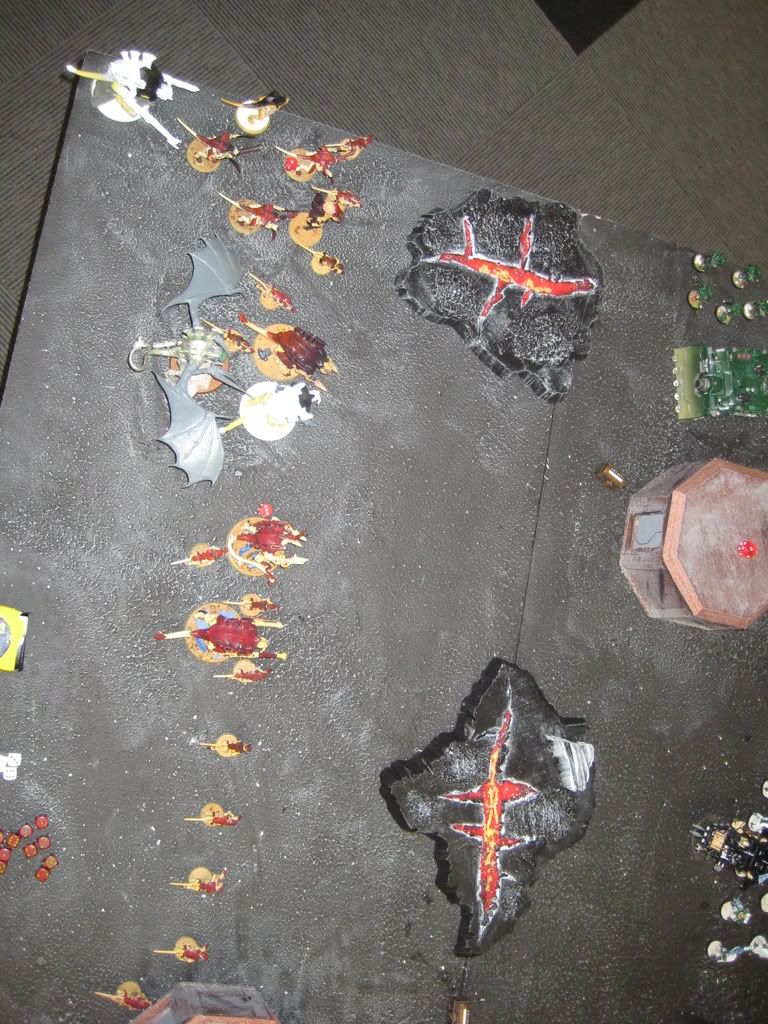
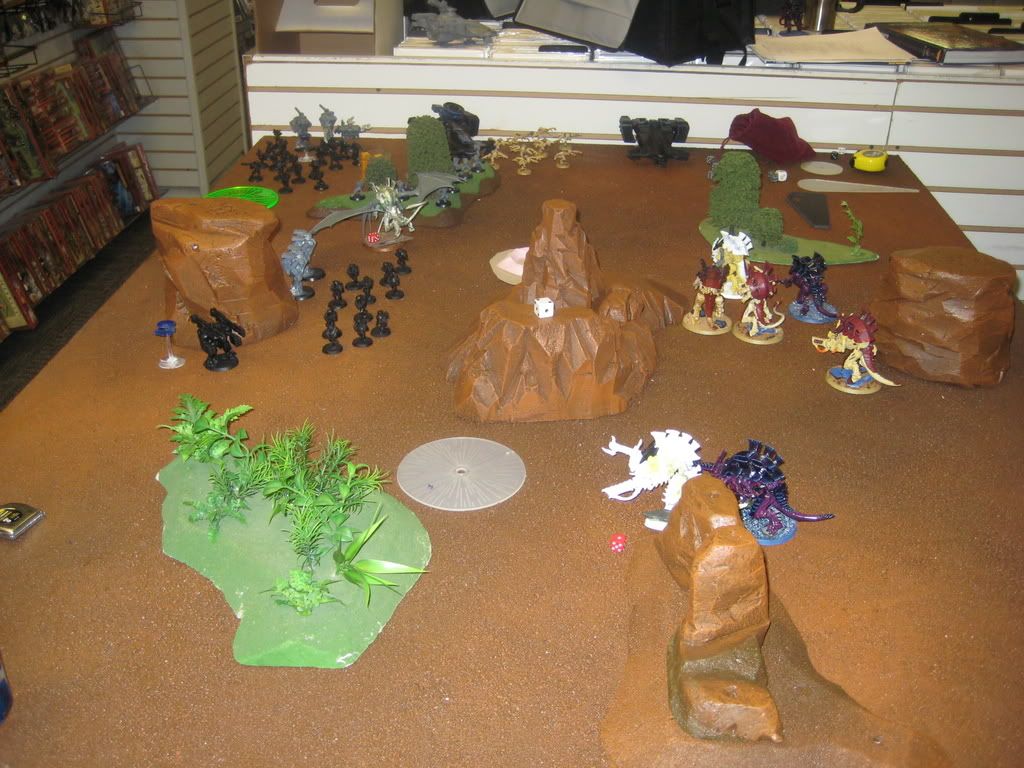
So with turn one there was little the Dark Angel player could do but move forward. Once again being blind, still at this point, I didn't realize what he was doing with his Marines running them forward and basically lining them against the side of the board. If I remember my casualties were one or two Gaunts from the first turn shooting.


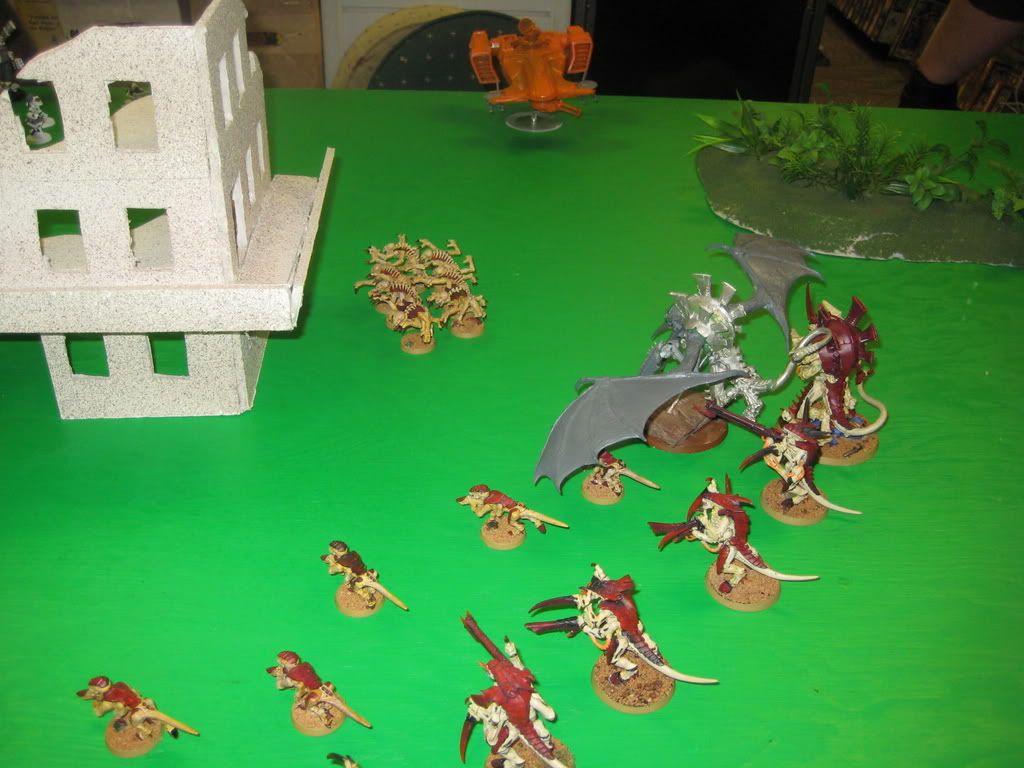
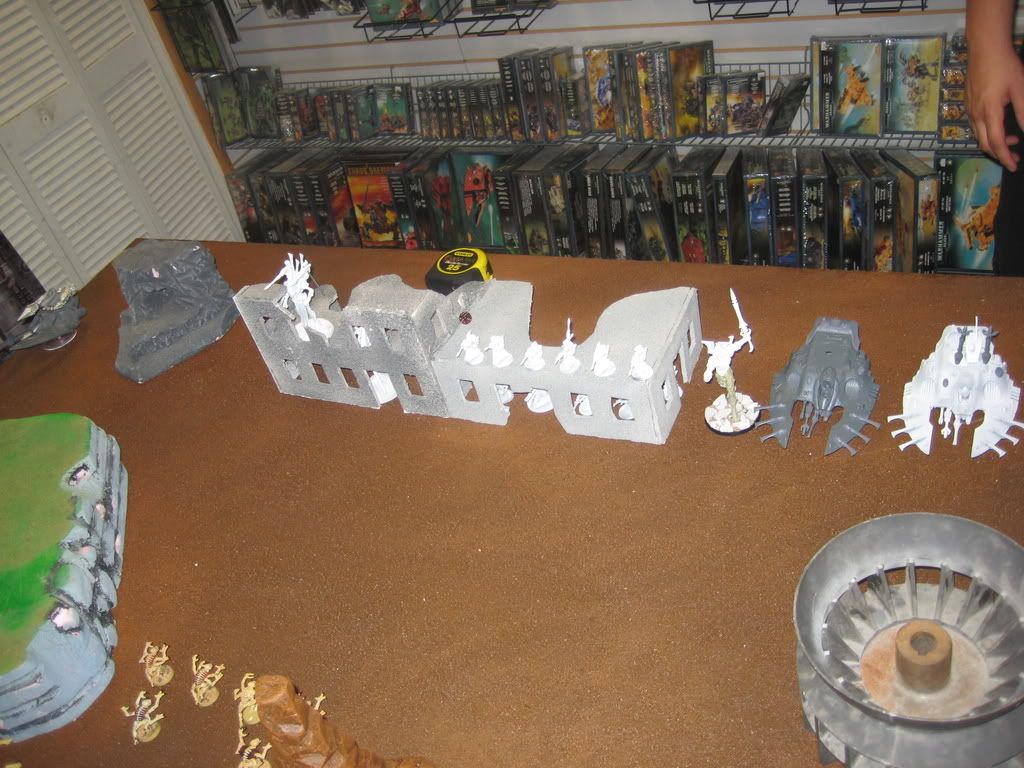
See the results here.

My Tyranid phase was quite a bit more effective. I managed to off a few marines as well as a couple scouts during my shooting. Not to mention my Flying Tyrant got ever closer to its target, the vindicator.


Turn Two:

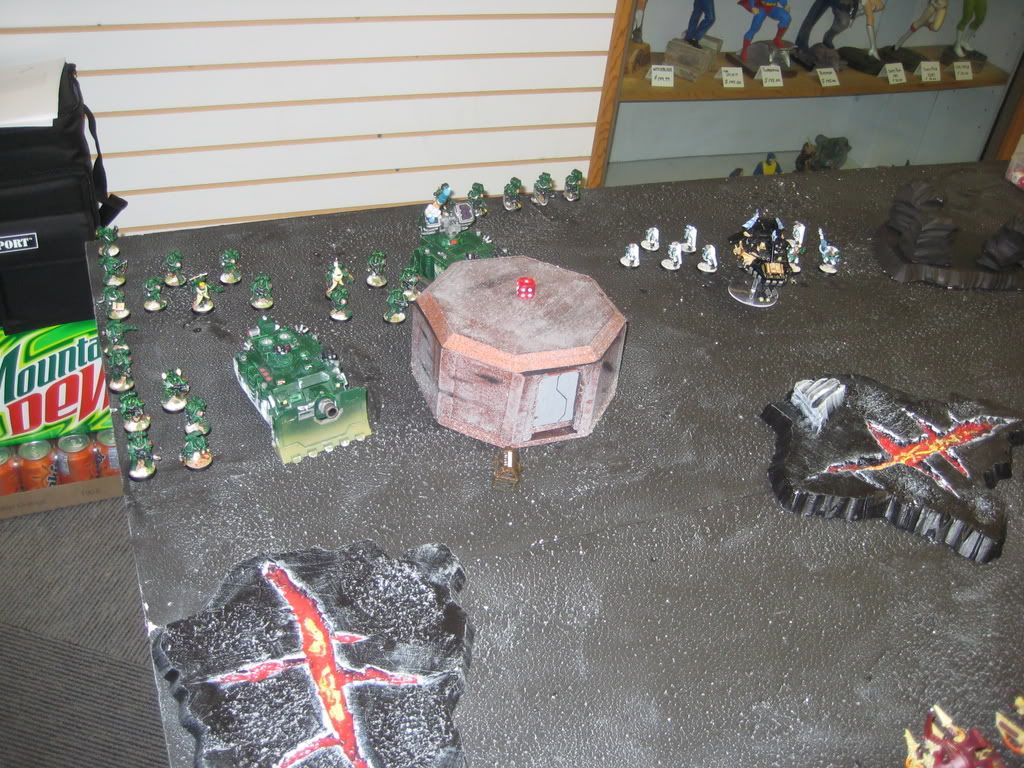
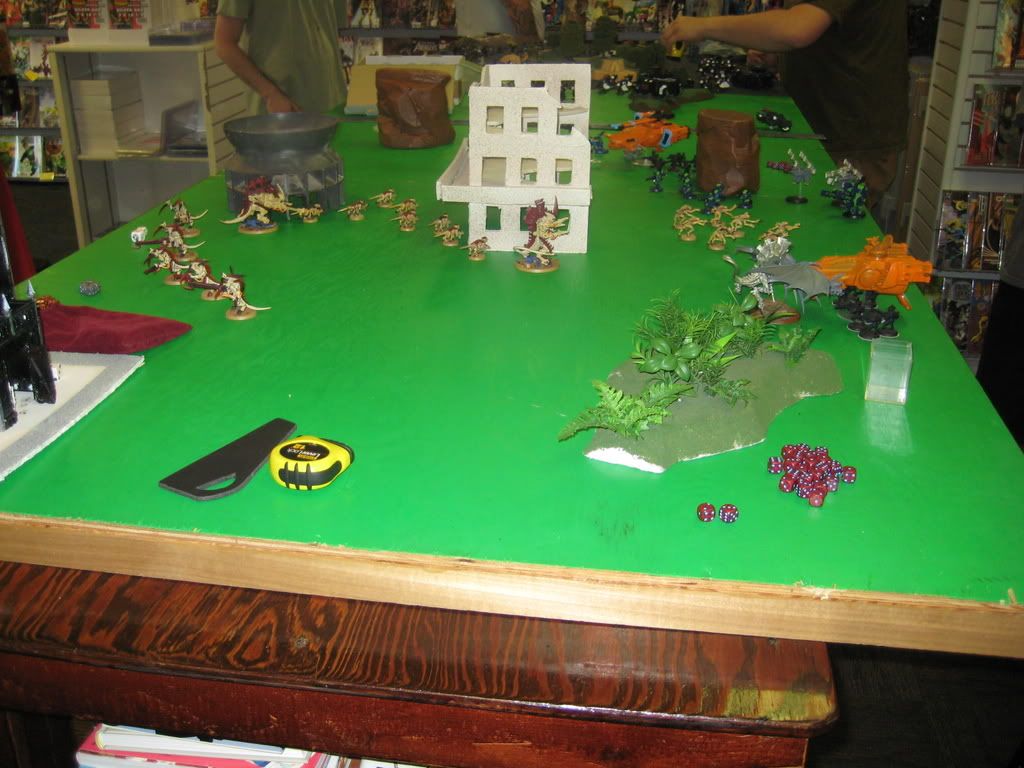
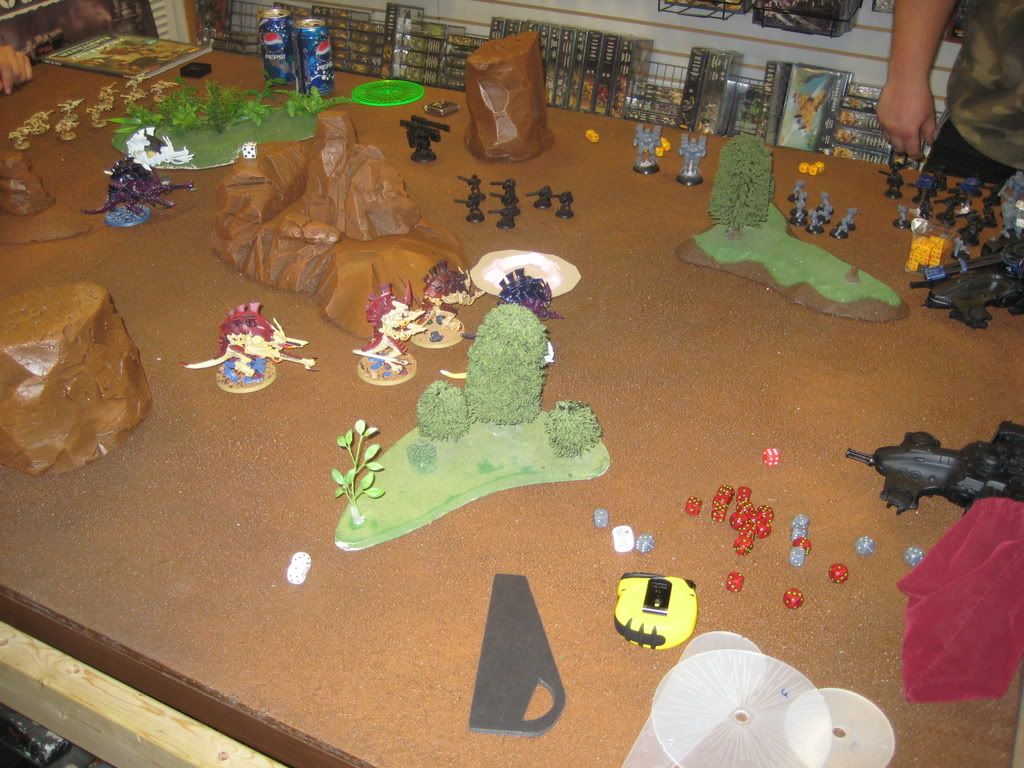
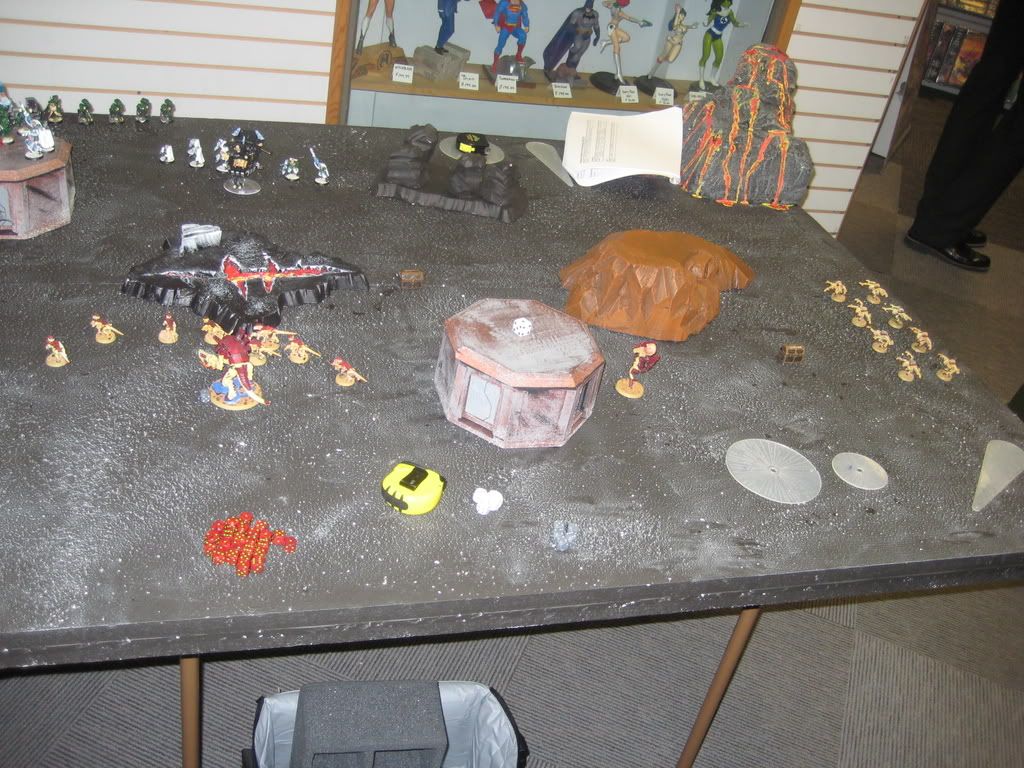
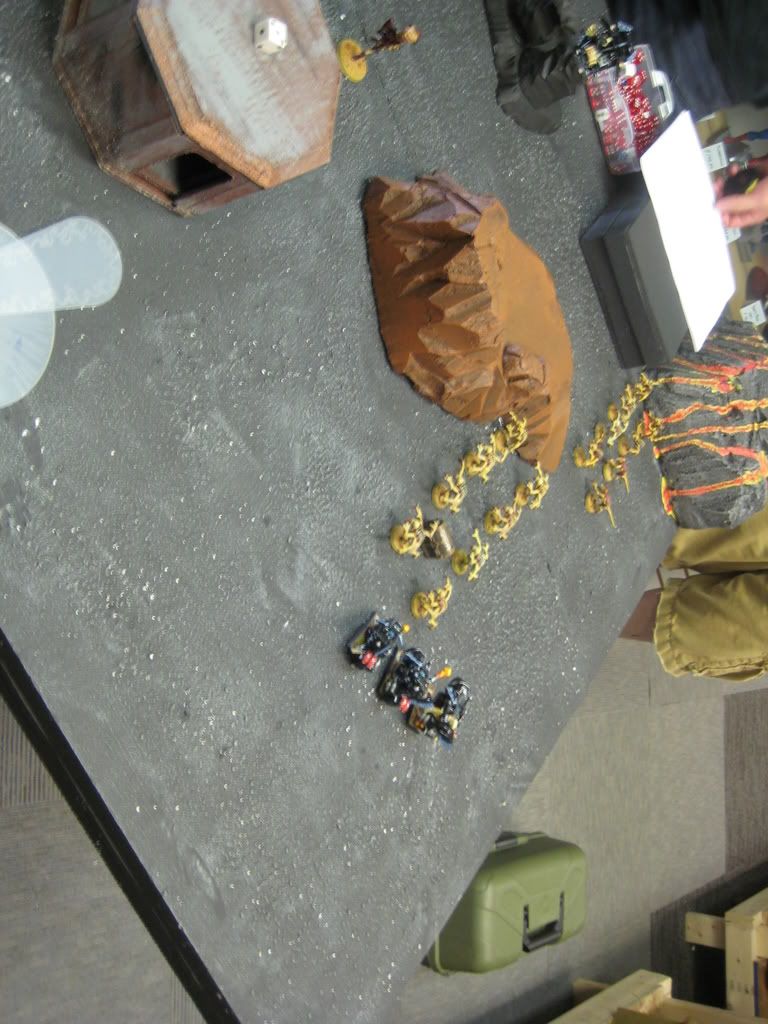
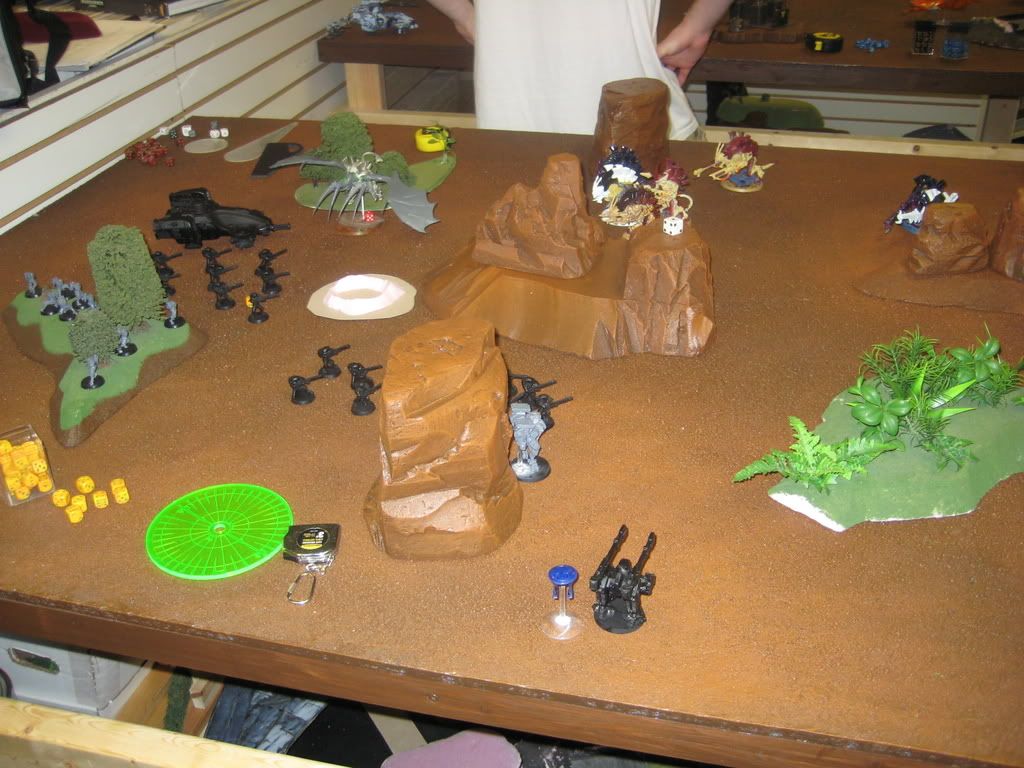
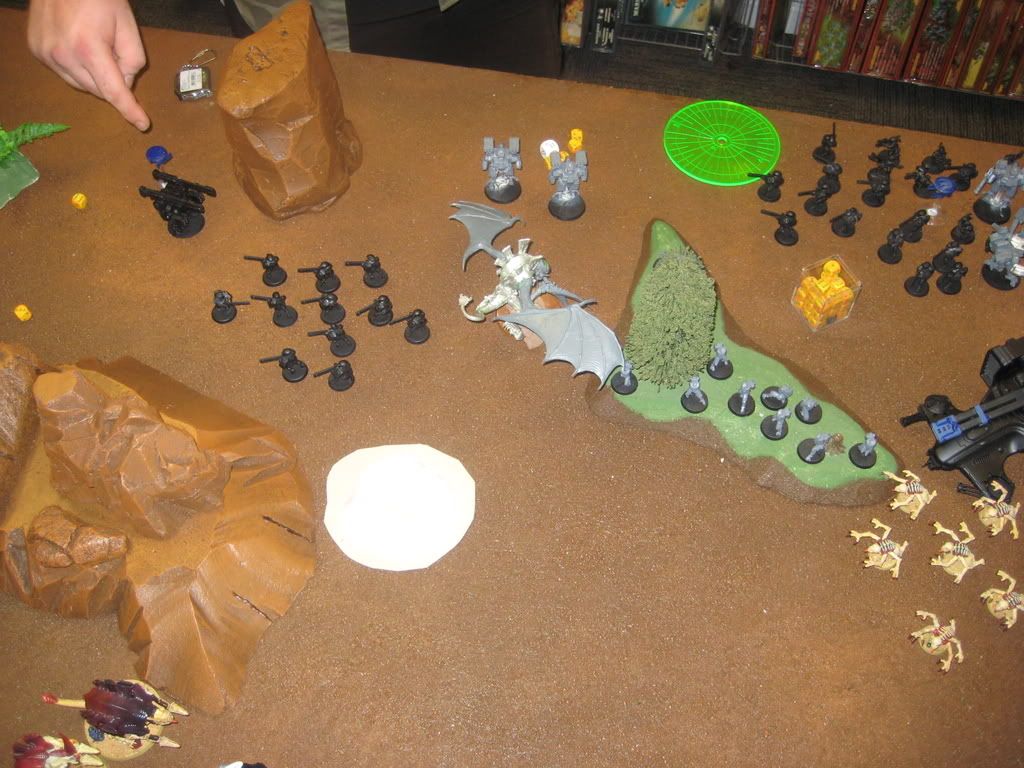
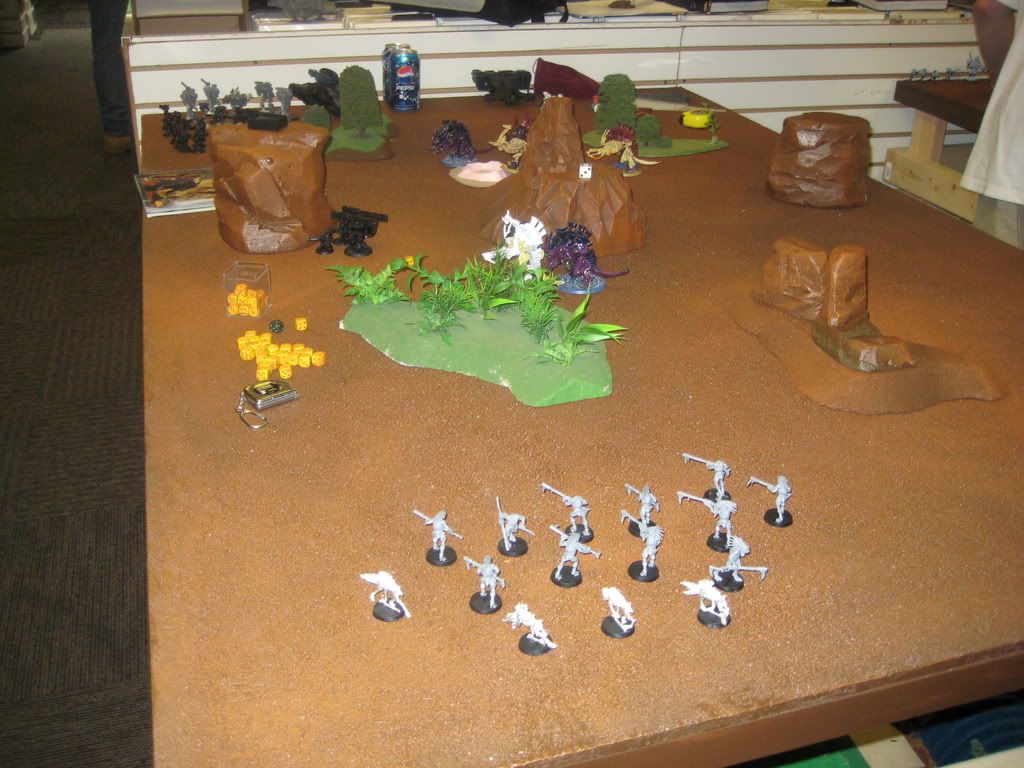
One down and finally the Dark Angels plan was realized. His outflankers as well as some more SM movement meant that he had blocked off the entire side of his table edge and if I were to have to outflank on my right or if I wanted to I was forced to do so on the other side of the impassible terrain. As for what actually got on the board during this turn. He manged to get two of the bike combat squads on the table however they were both the ones he didn't want to show up. Over all the Dark Angels turn was not what he had hoped for as he didn't down anything. Though he did get the Two Hive Tyrants weakened considerably.

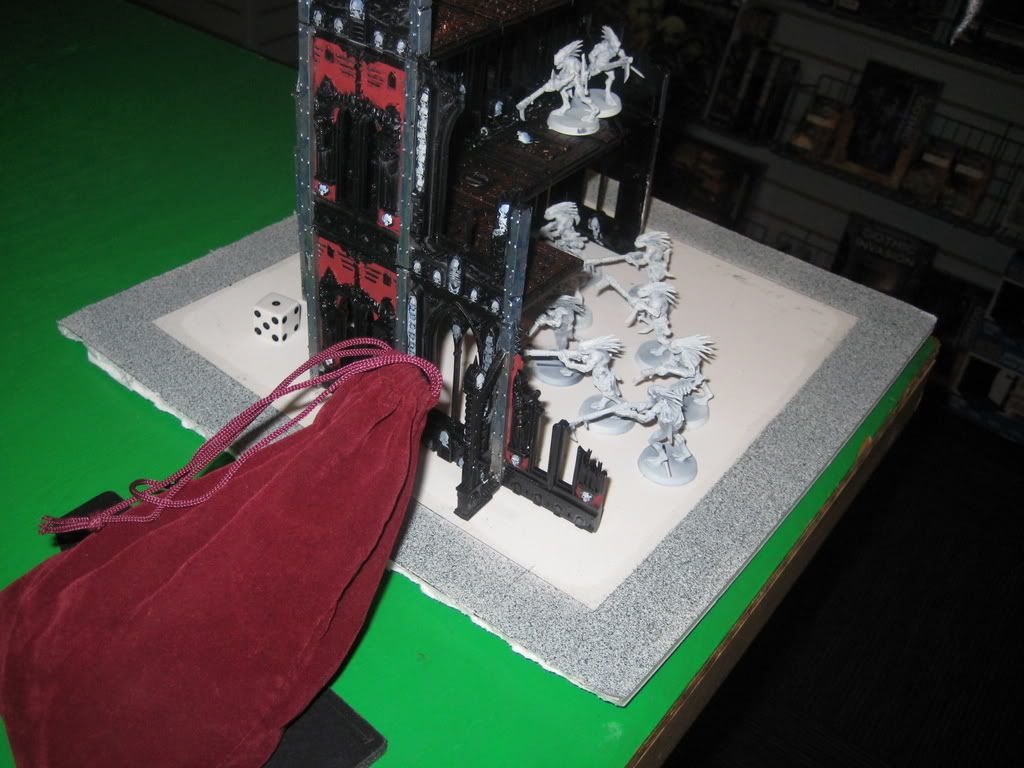
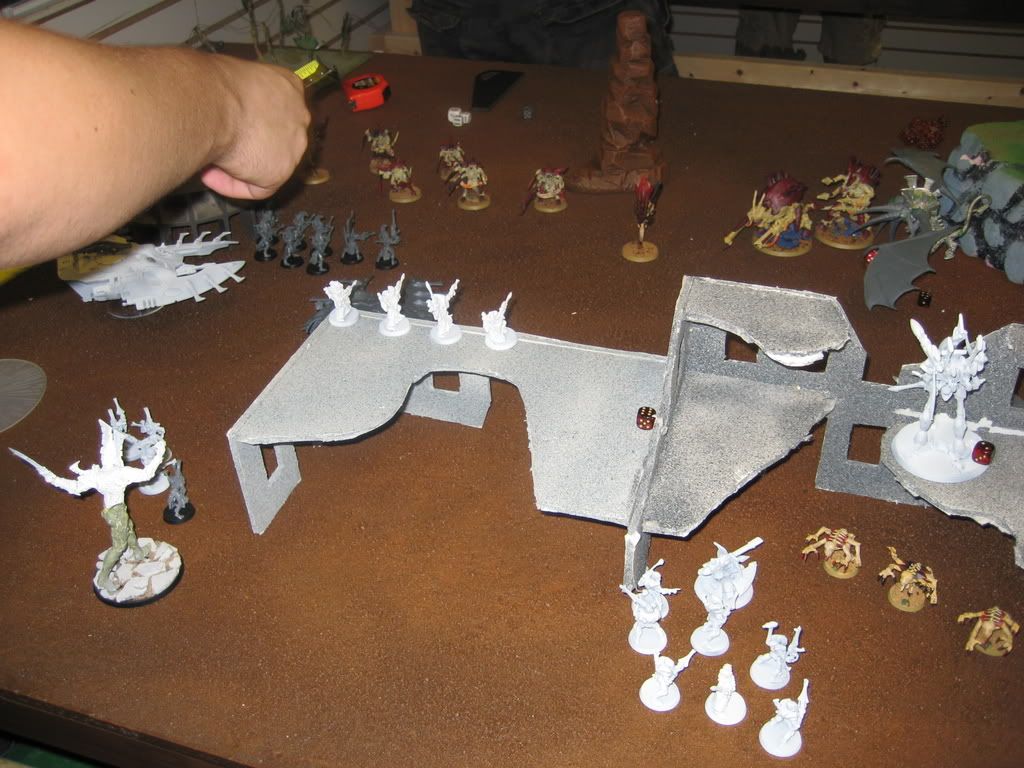
Then there was the Outflanking Genestealers! However due to his good tactics I was unable to place them anywhere useful. So there were two squads bunched up on the left side of the table, as I was forced to deploy them there, under the impassible terrain. There was also one squad coming out from the right to claim the objective on the so far dead side of the board. (The outflanking can be seen here and here.

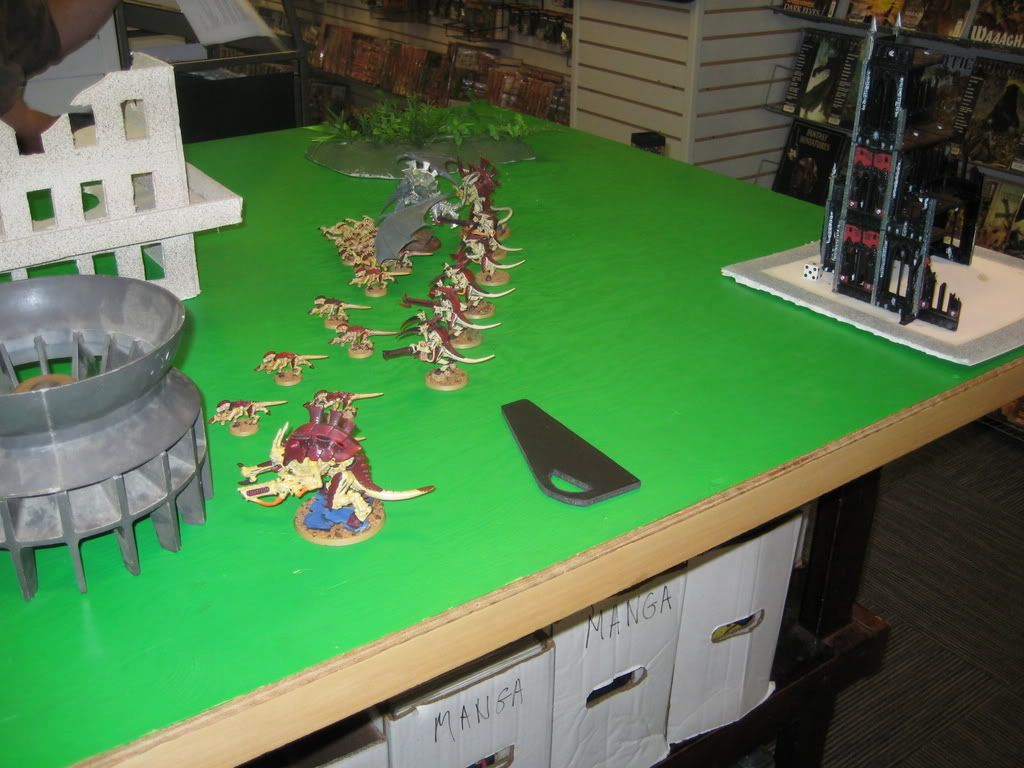
I'll let the picture speak for me on how this turn went after outflanking was done...


So yea as you can see my turn two was rather effective. I managed to wipe out quite a few marines including the bikes that had had just come on the board. I also managed to squash another Sniper.

Turn Three:
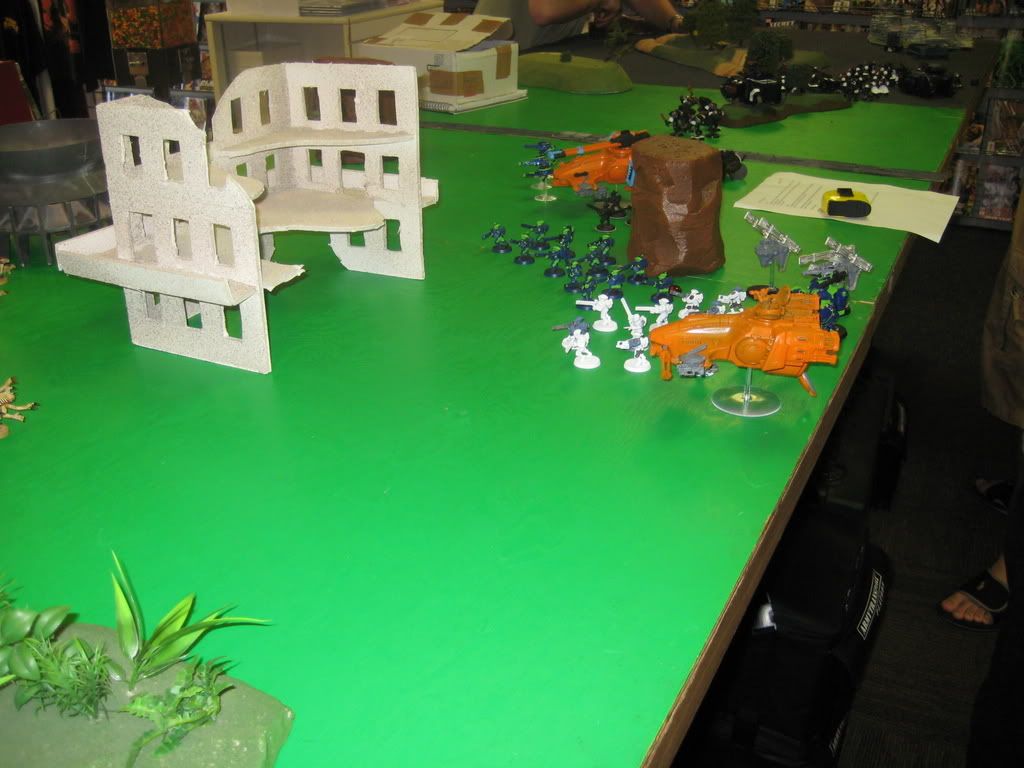
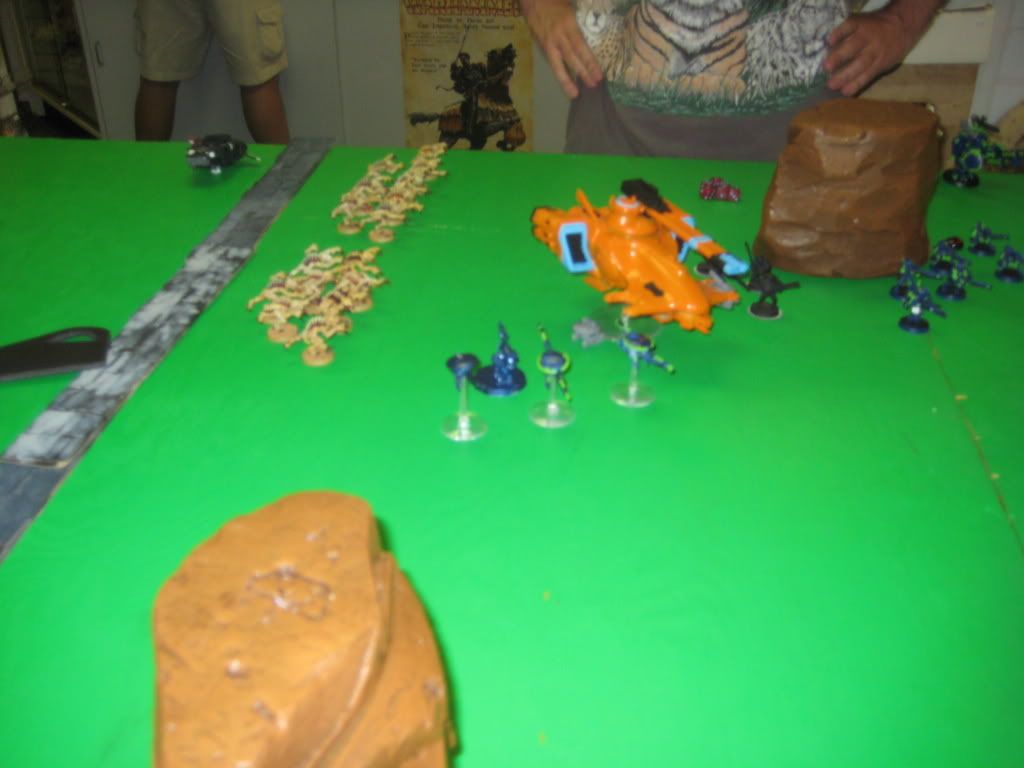
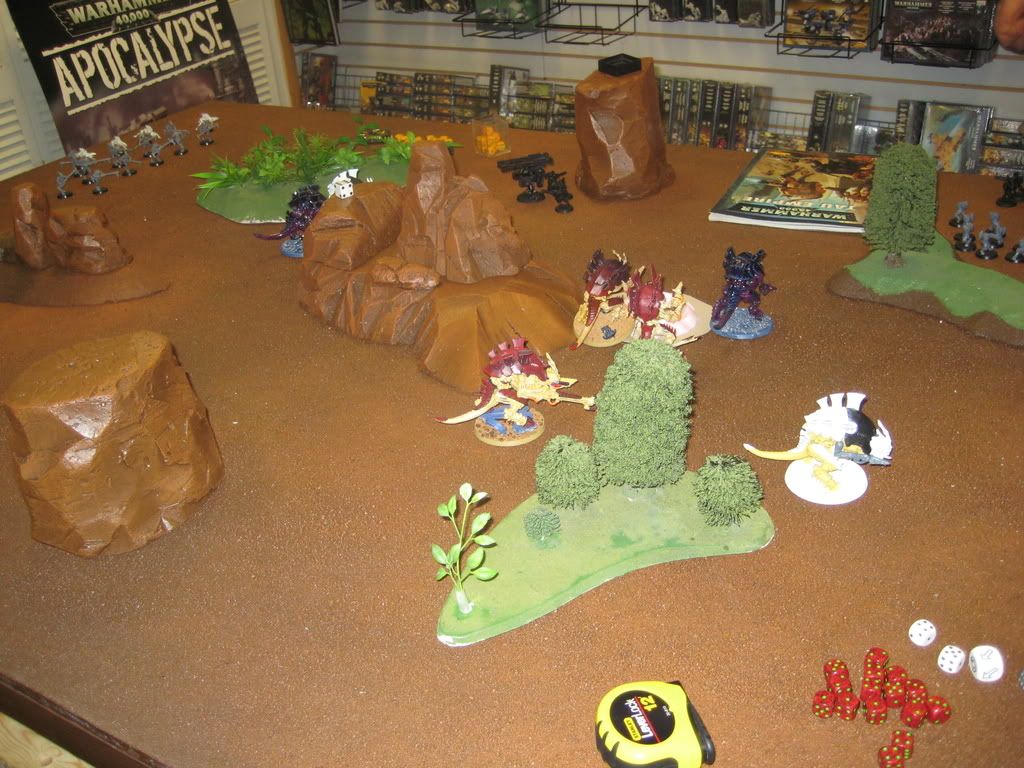
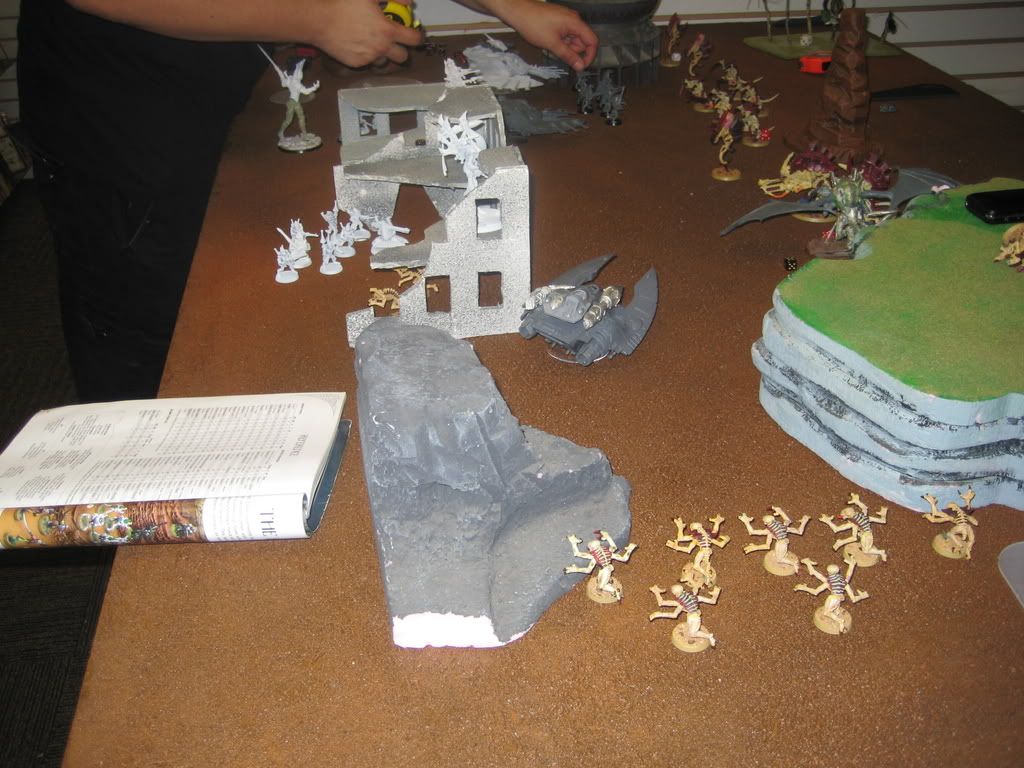
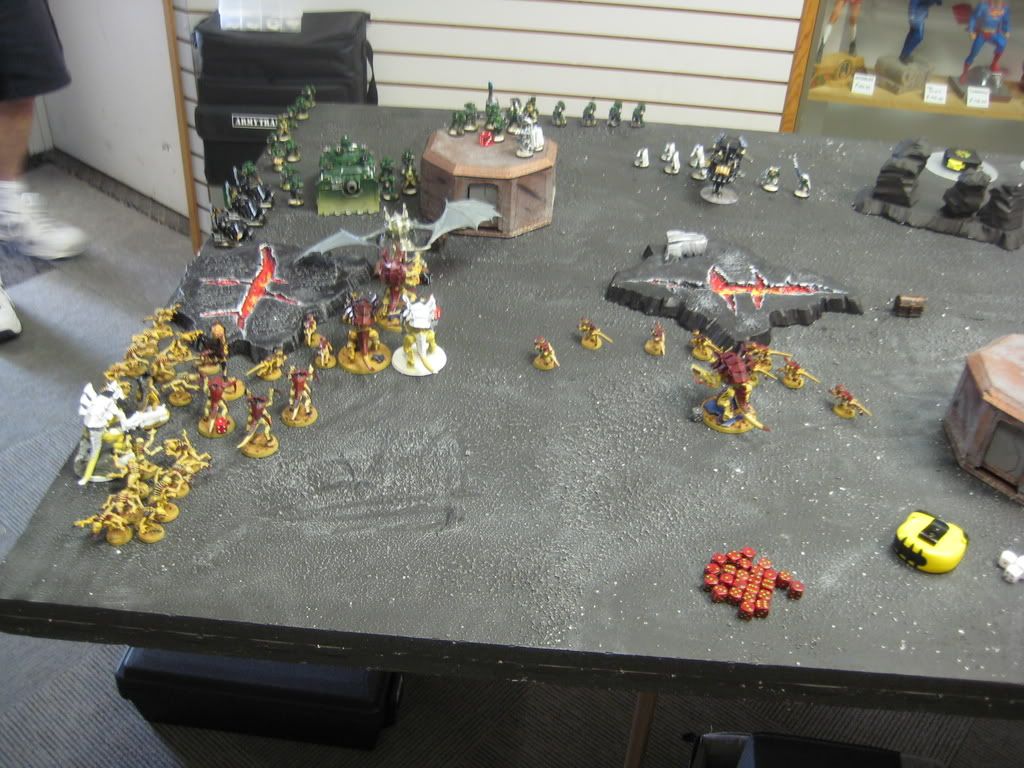
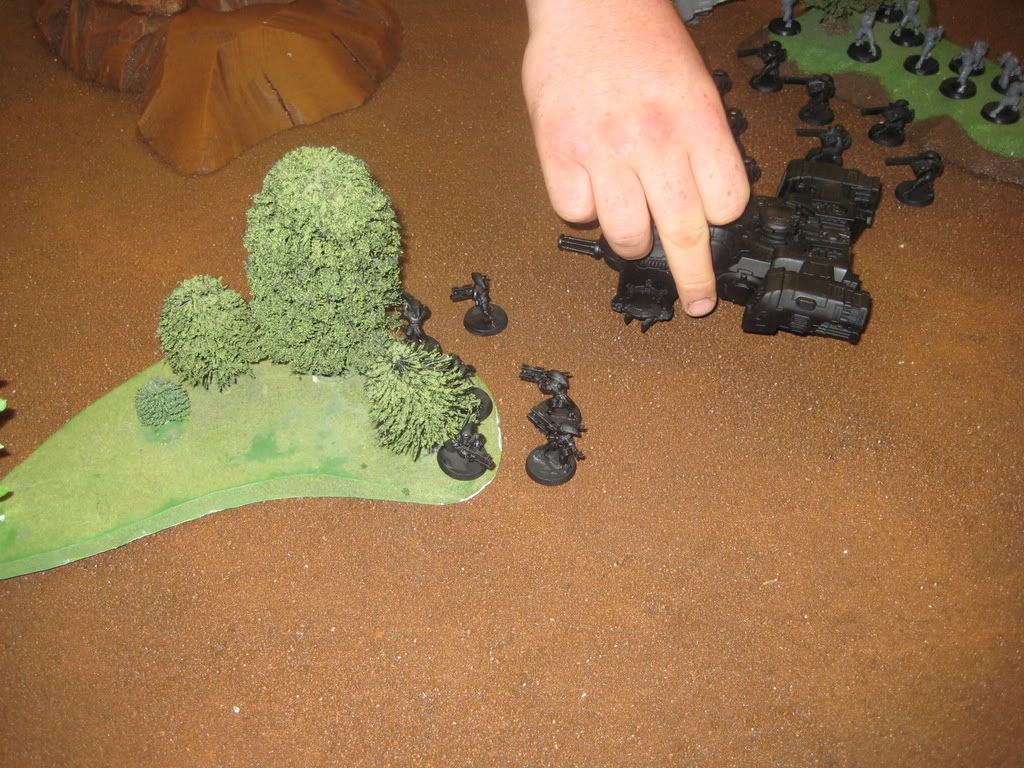
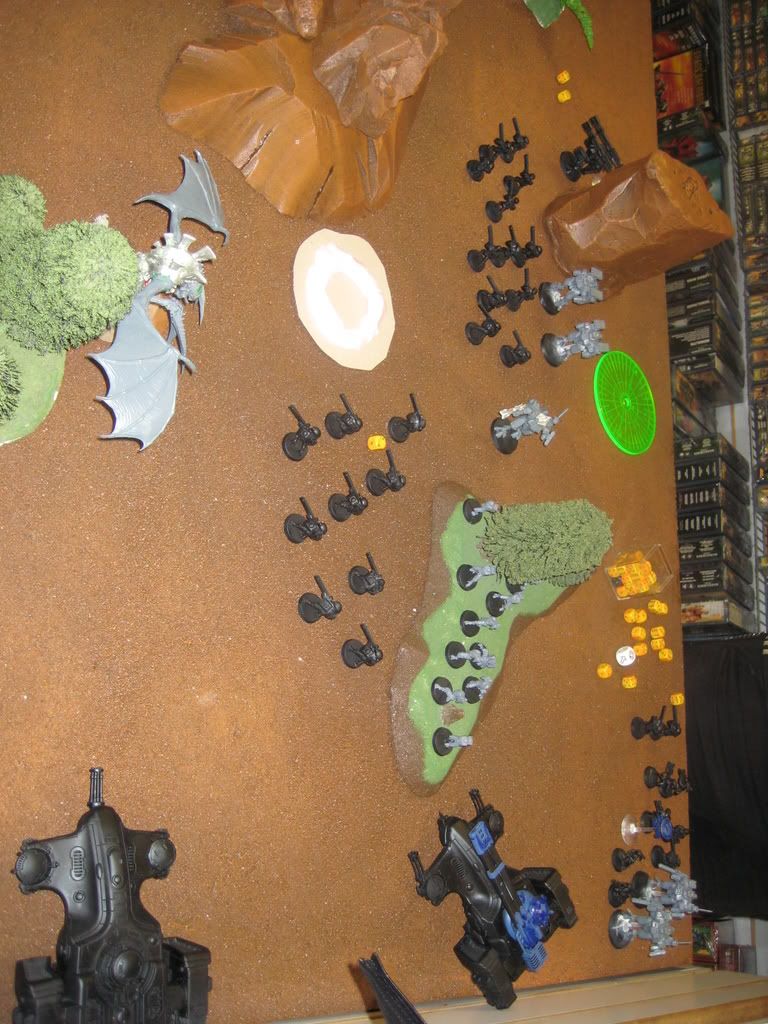
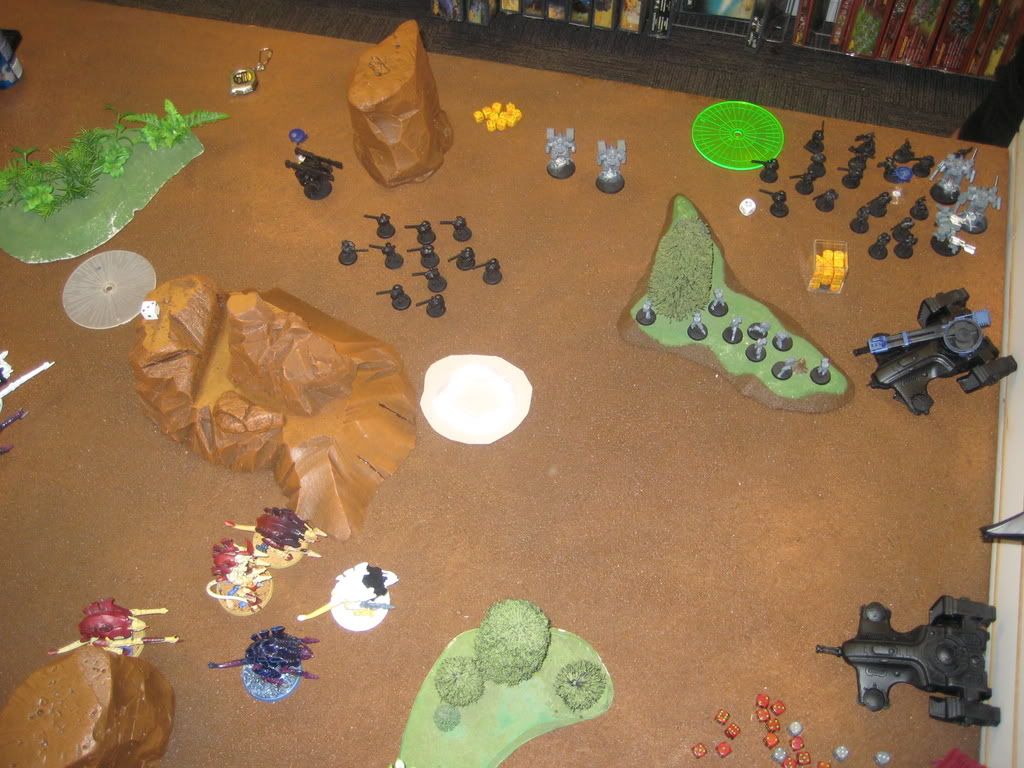
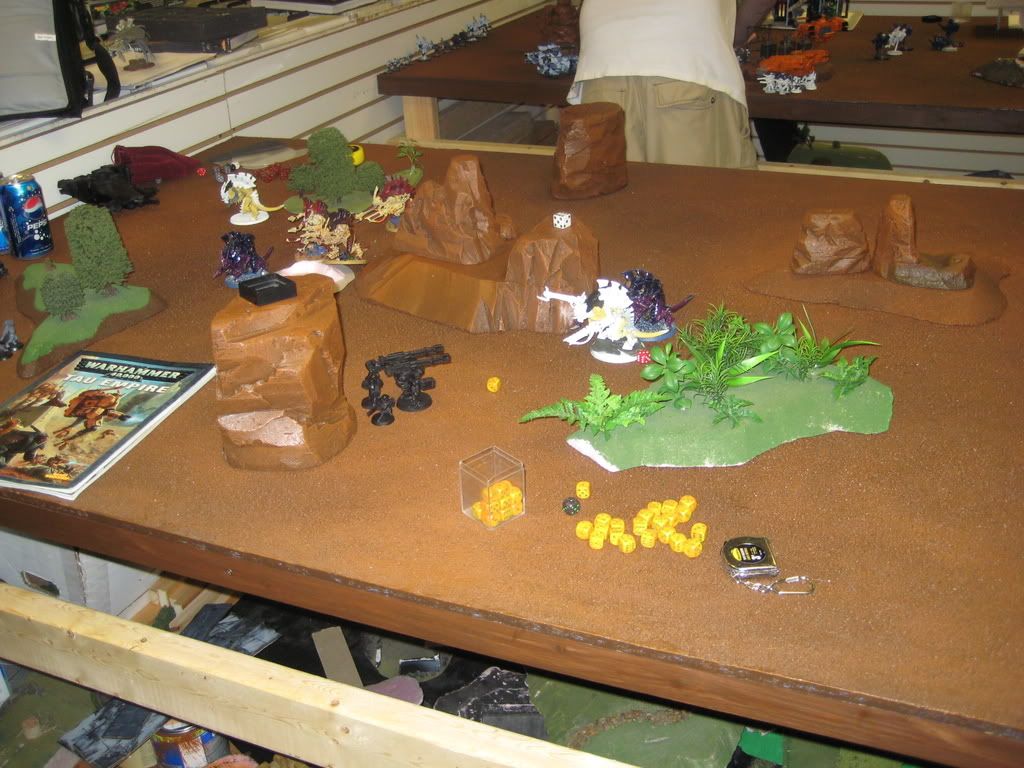
So my last turn went quite well and now it was time for those Dark Angels to take revenge! More outflanking bikes came in one squad with multi meltas in the small gap right next to my Hive Tyrants. Oh and I cant forget the squad of termies that Appeared right where that vindicator I destroyed last turn had been. (Start of the turn basically looked exactly like this.)

This is yet another time where pictures speak louder than words...


Once again. Devastation. However this time its me who took the hit, losing both of my Hive Tyrants but I didn't go without a fight! During my turn I made the Master of the Ravenwing nearly useless knocking out its weapons and then followed that one two punch with killing all but one of the snipers not to mention a few more marines died once again including all the bikes on the table! I should mention also that my final squad of genestealers came on the board on the right hand side away from all the action during this turn as well.

Turn Four:
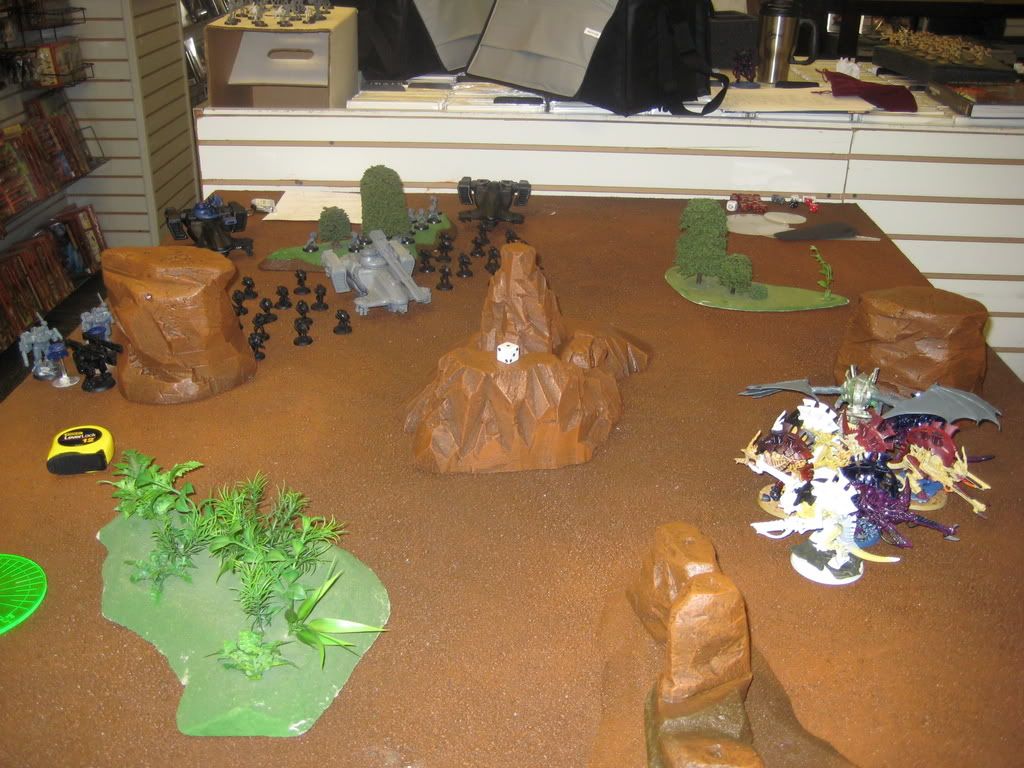
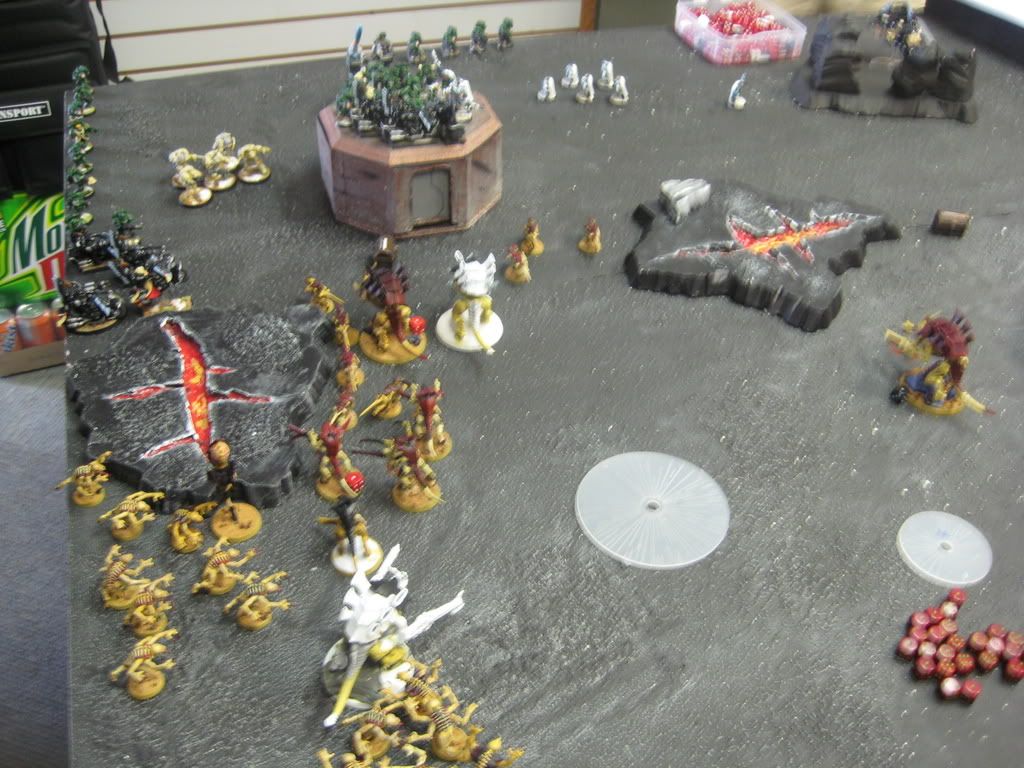
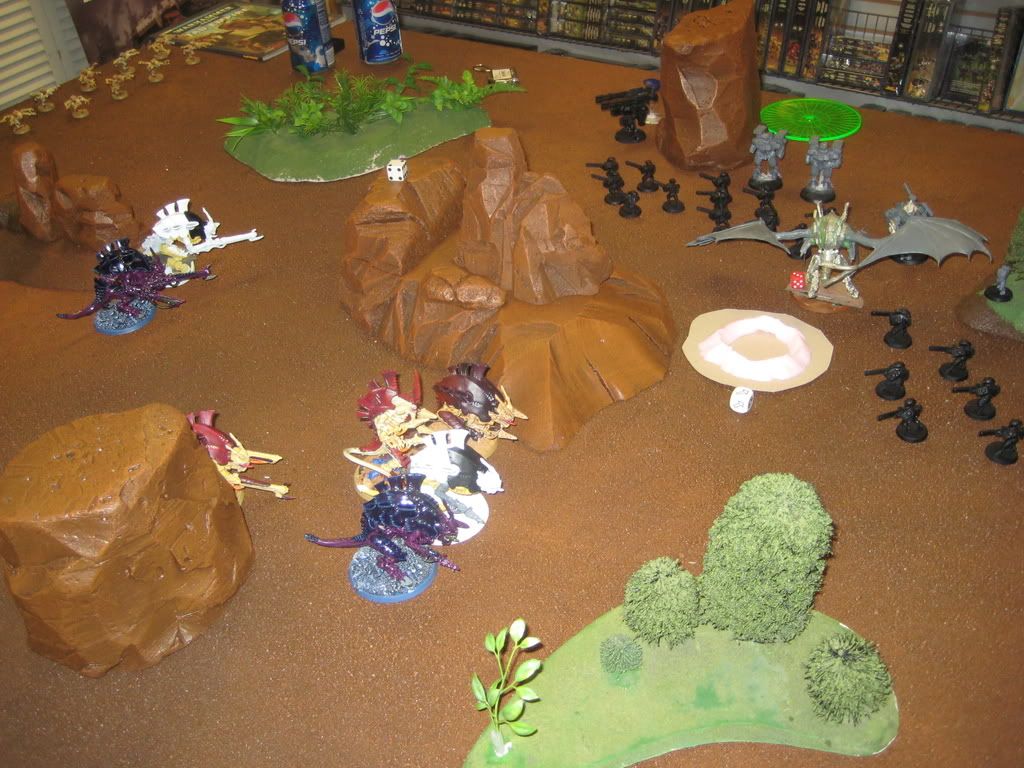
Things were looking good at the beginning of this turn the final squad of Bikes came in right next to the Genestealers in perfect formation to use their flamers to cause massive death! The Termies moved closer towards the massive horde of Tyranids and that's about all they could do.


Shooting and assault were the important parts of this round. The terminators ended up going for the genestealers in hopes to get rid of one squad that was threatening them but failed and were eaten alive. The Bikes demolished most of the squad it was targeting (Before andAfter Pictures)

My turn caused some more casualties and the death of the bikers before rolling for the 6th turn my opponent conceded the game and victory was mine.

Tournament Results 6-1-0 One Week Remains.

Thursday, August 21, 2008

Clockwork Comics Summer 40k Tournament Game 6

I was in a bad mood when I wrote this. Forgive me.


Tyranid Army


HQ:
Hive Tyrant - Enhanced Senses, Extended Carapace, Toxin Sacs, TL-Devourer(x2)
Hive Tyrant - Toxin Sacs, Winged, Scything Talon(x2), Warp Field

Elite:
Lictor
Warrior Brood - 5 Toxin Sacks, Scything Talons, Deathspitters
Troops:
Genestealers - 7 Scuttlers, Acid Maw
Genestealers - 8 Scuttlers, Acid Maw
Gaunt Brood - 8 Spine Fists, Without Number

Heavy Support:
Carnifex - Enhanced Senses, Reinforced Chitin, Barbed Strangler, Venom Cannon

Total Cost: Under 1500

*Forgive me for the lack of list*
Tau Army
*I refuse to figure it out. Do NOT emulate this guy*


Deployment
In typical Tau fashion when we went out to get terrain he came back with buildings, as you will see, and I came back with random stuff that was left over after everyone used up all the other terrain. I won placement of the first terrain piece so I took the larger of the two buildings and stuck it right in the middle. I figured that that would make the building near useless for him and I could use it to block LOS. Atypical Tau player took the other building and stuck it in the far corner, as for the rest of the terrain it was placed rather evenly around the rest of the board as to fill up the rest of the space. The damage was done.

As I don't have a before placement shot this is the best one I can provide for how the terrain was:
Image

Tyranid:
As you can see, the building in the center blocked LOS on things and if you couldn't tell already I won first turn and took it as well as the side that he had placed the building on. As for actual deployment I basically screened my warriors with my Gaunts, stuck a squad of Genestealers as close as possible in hopes that they would be bait, put the Scything HT as bait and as close as possible to absorb some firepower and get into contact with what would hopefully be a close tank, and the Carnifex sort of out of sight (mind you not out of LOS but kinda in the back so less thought was payed to it.

Image

Tau:
I don't think it was intentional, in fact I know it wasn't, but I think the placement of the Tau was probably one of the worst ideas ever. Fully knowing that I had a squad of Genestealers with Scuttlers (thus having the scout rule) he placed a squad of Firewarriors right on the edge of the possible deployment zone. As well as most of his units also being as close as possible. There were the broadsides in the back, sniper drones off to the side and tanks also to the side, however they were all still almost as close as humanly or xenosly(??) possible.

Image

Scout moves:

So what would you do if you had a scout move with a tank that was near a flying Hive Tyrant with Scything Talons? I would suggest you move away but hell if you want to move closer Mr. Tau feel free I'll take the free first turn assault. Oh and did I mention the Fire warriors being really close to the Genestealers that had a scout movement? I will give him his best move of the game Infiltrating Kroot right behind me in that building that I stole from him.

ImageImage


Turn One
So this was the beginning of the end right here. During the shooting phase I wounded some of the Firewarriors across from the Carnifex with the Barbed Strangler and he failed a pinning test. Thus one squad of Firewarriors was useless. The Warriors mowed down some of the Kroot in the building behind them sadly I didn't kill them all as that would have made the game end far sooner. The Dakka Tyrant also did some damage to the previously mentioned Firewarriors knocking them down a bit as well. I used Run to move the Gaunts and then proceeded to enter Assualt.

Remember those two REALLY bad things I said the Tau player did? Yea, Assault first turn with a Devilfish and with a squad of Firewarriors. Now the Devilfish had Scouted 12" thus I needed Sixes to hit it lucky for me I managed to stun the thing with my Flying HT. As for those Genestealers, they assaulted the Firewarriors. Best part is, I only scored One... ONE wound on them. But, I saved the two wounds that they got on me and won combat. Now apparently Tau can't make a LD test to save their lives... literally and they failed and then failed their sweeping advance check. So once again. ONE wound from Genestealers on a 12 man squad of Firewarriors = 12 Firewarriors off the table.

The Tau players turn was... unimpressive I think he got a wound or two on the Flying Tyrant. Oh and during his movement he deployed the squad from in the Devilfish, I think Pathfinders, and instead of moving to the Genestealers to shoot them up with Rapidfire he moved away and was stuck shooting at the Hive Tyrant. That's all folks.

Image
Another image Here.

Turn Two. And Beyond!

So as to save myself the grief of reliving this game in full detail I will recall the events of the rest of the game in a quick manner. However I will let you see why the game ended on turn two.

Reserves:
Two Squads of Genestealers and my Lictor came out.

Image
Lictor can sorta be seen here in the corner of the building.

Week 6 was a Win though it was not fun. So far... 5-1-0 Win-Tie-Loss. If you have been following along then you would know that I have been tied with another guy in the tournament for the entire time and our only tie is to each other. He didn't make it to this past Sundays game and I'm friends with the guy that he is playing his makeup game with. So as of now I have no Idea if were still tied or if I'm in the lead now....
Go Dan!!! Push me ahead!:-P

Sunday, August 10, 2008

Clockwork Comics Summer 40k Tournament Game 5

Week Five of the LGS Tournament, this week was my Tyranid army versus a Tau army at 1500 points. The game this week was Annihilation with the Spearhead deployment. So without further adieu:

Tyranid Army

HQ:
Hive Tyrant - Enhanced Senses, Extended Carapace, Toxin Sacs, TL-Devourer(x2)
Hive Tyrant - Toxin Sacs, Winged, Scything Talon(x2), Warp Field

Elite:
Carnifex - Enhanced Senses, Flesh Hooks, TL-Devourer(x2)

Troops:
Genestealers - 9 Scuttlers

Heavy Support:
Carnifex - Enhanced Senses, Flesh Hooks, Reinforced Chitin, Barbed Strangler, Venom Cannon

Total Cost: 1500

*Forgive me for the lack of list*
Tau Army

HQ:
Commander - TL Burst Cannon, Airbursting Fragmentation Projector

Elite:
Crisis Battlesuit - 2 Suits TL Missle Pods and Burst Cannon
Crisis Battlesuit - 2 Suits Plasma Rifle, TL Missle Pod

Troops:
Fire Warriors - 12 with Pulse Rifles
Kroot Squad - 16 Warriors and 4 Hounds

Fast:
Pathfinder - 8 w/ Devilfish Upgraded to have Marker Light

Heavy:

Broadside Battlesuit - Smart Missle System, Railgun, Advanced Stabilisation System
Hammerhead Gunship - Railgun, Smart Missile System

Deployment
The Tyranids won the deployment but gave it to the tau player so Tau got to choose his quarter and deploy first. Tau kept the Kroot in reserves. Tyranids Kept the Genestealers in Reserves. Before turn one the Tau player had a scout move. Then the Tyranids attempted to Seize the Initiative but failed.

Image
More Deployment Pictures Here and Here.

Turn One
The game began with the Tau player attempting to find the best way to see the TMC's but there he ended up having to move the Hammerhead rather close to get LOS while still having LOS on the rest of the things he wanted to shoot with. His movement ended up looking like this.

After some lame shooting and putting two wounds on the TMC's the Tyranid's started the game with a bang. The Pathfinders got owned and one of the Hammerheads was eaten by the Hive Tyrant.

Image
Other angles here and here.

Turn Two
Again the Tau had to maneuver around all of the LOS blocking terrain and as they had lost one of their main weapons it was all they could do but regroup move away and send as many shots into the Nids as possible. The Suits moved over so that they could get shots on the Flyrant as well as almost everything on the board. The Tau movement can bee seen here. The Tau roll for the Kroot Failed but the commander came in exactly where planned. So it was time for shooting which was aimed at the Hive Tyrant... and failed. Though wounded the Tyrant lived and clearly was pissed. After another round of shooting it was the Tyranid turn.

The Genestealers outflanked one on each side of the table, pictures here and here, and thus threatened the other hammerhead. The TMC's moved out and around the Rocky outcropping and then shooting began. The devilfish got stunned an entire squad of Firewarriors was defeated and the suits were damaged and beaten. During assault the Commander was assaulted by the Hive Tyrant and easily defeated.

Image
More here , here and here.

Turn Three
The Tau finally got themselves a moral victory during this turn after two and a half turns the Hive Tyrant finally fell to far too many shots from pulse rifles and missle pods. With the Tyrant down the Tau were free to focus on other things like wiping out in its entirety one squad of the genestealers. After the shooting died down the battlefield looked like this.

The Tyranids just continued to move forward and shoot. Glancing the Devilfish and getting a weapons destroyed result as well as forcing the fire warriors in the forest to run away. Then thinned out the remaining units before the end of turn three.

Image

Turn Four
During this turn the Kroot finally came in they walked on behind the remaining genestealers and proceeded to shoot them into bits. During the movement the Tau moved closer to get some more shots on the carnifexes nearby. Pictured Here. As well as the aftermath here.

Simply put the Tyranids walked forward did more shooting killed more Firewarriors got closer to the devilfish and the Genestealers died in assault to the Kroot.

Image
More here and here.

Turn Five
This turn was really just more of the same. At this point we were just having fun and he was trying as hard as possible to kill the Carnifex that he had been working on killing all game. The Tyranids Killed the Devilfish and most of the remaining Firewarriors.

Image

Turn Six
The last turn of the game was short as there was little left to do. The Tau got a second moral Victory by killing the Carnifex after a game of trying and all that remained at the end for Tau was the Kroot and the Broadside.

Yet another Tyranid Win and bringing me to 4 Wins - 0 Losses - 1 Tie for the Tourny.
On a side note the guy I played last week and that I've been tied with for first place won as well and the shop owner decided as a house rule that Nids coming in Without Number must take a Ld test to count as Scoring or contesting if they aren't in synapse range.

Monday, August 4, 2008

Clockwork Comics Summer 40k Tournament Game 4

My LGS is currently hosting a 40k Tournament on Sundays, based in 5th edition it's 3 games of 1000 points 3 games of 1500 points and 2 games of 2000 points over 8 Sundays. This past Sunday, yesterday 7/3/08, was the 4th week in the tournament. Going in I knew it was a 1500 point Capture and Control Pitched Battle but no idea who I would be fighting against. My opponent ended up being a guy named John, John won the last tournament as Nids and was now playing as Eldar. Both of us started the game with a 3-0-0 Record so the battle was important.

(My) Tyranid List

HQ:
Hive Tyrant - Wings, Toxin Sacks, Scything Talonsx2
Hive Tyrant - Toxin Sacks, Extended Carapace, Enhanced Senses, Twin-Linked Devourerx2

Elite:
Lictor
(5)Warrior Brood: Toxin Sacks, 4 Deathspitters, Barbed Strangler, Lash Whips

Troops:
Genestealers: 7 Stealers with Acid Maws and Scuttlers
Genestealers: 6 Stealers with Feeding Tendrils and Scuttlers
Gaunts: 9 Gaunts Without Number and Flesh Borers

Heavy Support:
Carnifex: Barbed Strangler and Scything Talons
Zoanthrope: 3 with Warp Blast
(Johns) Eldar List:
HQ:
The Avatar of Khaine

Troops:
Pathfinders: x6
Guardians: x10 Warlock w/Embolden ad Spirit Stealer Scatter Laser
Dire Avengers: x10 Exarch w/Aveger Shuriken Catapult x2 and Blade Storm
Wave Serpent: TL Eldar Missle Laucher Shuriken Cannon Spirit Stones
Dire Avengers: x10 Exarch w/Aveger Shuriken Catapult x2 and Blade Storm
Wave Serpent: TL Eldar Missle Laucher Shuriken Cannon Spirit Stones

Heavy Support:
Fire Prism: Prism Cannon Shuriken Cannon Holo-Fields Spirit Stones
Wraithlord: Bright Lance Eldar Missle Launcer Flamerx2

Pre-Game Information:
Mission - Capture and Control
Deployment - Pitched Battle
Size - 1500
First to Deploy - Eldar (John)
First Turn - Eldar (John)


Deployment
Eldar: On one far side of the board he placed his Fire Prisim and on the other the Wave Serpents. The center of the board was where the rest of his army resided, on the top floor of the building in the middle of his deployment zone were his Rangers while on the other side were the Wraithlords and Warlock/others.


Tyranids: the Big Bugs hid behind a large rock outcropping across from the Fire Prisim hiding the two Hive Tyrants and giving the Carnifex a cover save from fire. In the center of the board open to fire was a line of Gaunts protecting the Warriors also spread out across the center. Then the Zoanthropes were placed behind this line as well rather equally apart for Heavy Support. Finally one group of Genestealers (the squad of 6) deployed in the opening and scouted 6" closer to the Eldar.

Top of Turn 1
The Eldar's first turn was rather uneventful. His movement phase was essentially just shifting everything around on the board. Most of the units on or near the building moved to around for better firing positions while the skimmers moved back away from the board edges and hid. The only real movement that occurred was the Fire Prism moving so that it could get a shot on the Stealers.
Shooting was full of misses and failures. John rolled a lot of ones and twos and after a die roll to decide if the Carnifex was in 50% cover or not it didn't matter because the rangers failed to wound anyhow. The Fire Prism shot missed and scattered away. All in all the Tyranids lost little, just a few Stealers.

Bottom of Turn 1
Tyranid's turn to get closer. Movement was a lot more eventful for the Nids the Big bugs walked into the open and started to open fire on the Eldar. The Gaunts continued to screen the Warriors and Moved and Ran closer to the Eldar. The Zoanthropes and Warriors blasted the rangers to bits (though Only killed two in the end) and the Genestealers got about 2cm out of range from Assault with the Eldar in the building. As for shooting not much really happened some of the rangers died and that was about it.


Top of Turn 2
Starting here is where things get a bit fuzzy. Realizing this is the game for first place we both started to care less about pictures/remembering what was going on and really got into the game. The Eldar again just really shifted around in the building, however this time the Wave Serpents came out to form a defensive shield and disembarked both squads in hope that they could fire. Shooting was no more impressive than the previous round, the disembarked squads were just out of range and the rangers did little. But there were wounds done to the Flying Hive Tyrant and thus it went to ground so it could save it self from total distruction.

Bottom of Turn 2
After one squad of genestealers came on the board and couldn't get close enough to assault the fire prisim things kicked up in this round with the Gaunts headed between the Wave serpents to assault the squad closest to it. The warriors blasted the squad behind that and caused multiple wounds killing almost all of one squad. The Zoanthropes failed miserably at trying to take down Wave Serpents. The Genestealers managed to get into combat with a wraith lord and eat it alive and just before that the other wraithlord was defeated by 12 shots from the devorer guns on the other Hive tyrant.


Now the game was still so close that it was scary. During this turn I lost some of my warriors and my Flying Hive Tyrant, then the DakkaTyrant managed to get some wounds on it as well. I ended up wiping out a squad of his guys and he finished off my Stealers that were in the building. I got in the rest of my army, my lictor deepstriked and got in combat with his Warlock and the squad with it and the genestealer got into some action as well.

The Rest of the Game
As said before the was getting extremely stressful, its a tournament game and though were both being nice were playing to win. Now around turn 4 were starting to get an audience of all the players that were finished with their games and the store owner came to watch. Through out the next two rounds the Avatar got in close combat with my carnifex and they fought until the end of the game with the carnifex finally dying. My Dakka Tyrant died in turn 4's shooting phase and I killed his fire Prisim both wave serpents and all of the squads therein. The game came down to the two objectives. During turn 5 I assaulted and got into contesting range of the objective on his side of the board, locked in close combat with a guy that has a 2+ save made it nearly impossible for him to take that one.

What Decided it all... at the last turn my Gaunt squad came on the board to try and claim my objective. I had lost all the Genestealers during his turn that were in range to claim my objective and all I could do was hope that I passed my LD check on the gaunts so they would count as scoring units. I failed. The game was a Draw!

Now were both in line to have to face off again (if we continue to win against other players) with a 3-0-1 record. Tied for first place. It was probably the best and most stressful game I've played yet in my time.