I was in a bad mood when I wrote this. Forgive me.
Tyranid Army
HQ:
Hive Tyrant - Enhanced Senses, Extended Carapace, Toxin Sacs, TL-Devourer(x2)
Hive Tyrant - Toxin Sacs, Winged, Scything Talon(x2), Warp Field
Elite:
Lictor
Warrior Brood - 5 Toxin Sacks, Scything Talons, Deathspitters
Troops:
Genestealers - 7 Scuttlers, Acid Maw
Genestealers - 7 Scuttlers, Acid Maw
Genestealers - 8 Scuttlers, Acid Maw
Genestealers - 8 Scuttlers, Acid Maw
Gaunt Brood - 8 Spine Fists, Without Number
Heavy Support:
Carnifex - Enhanced Senses, Reinforced Chitin, Barbed Strangler, Venom Cannon
Total Cost: Under 1500
*Forgive me for the lack of list*
Tau Army
*I refuse to figure it out. Do NOT emulate this guy*
Deployment
In typical Tau fashion when we went out to get terrain he came back with buildings, as you will see, and I came back with random stuff that was left over after everyone used up all the other terrain. I won placement of the first terrain piece so I took the larger of the two buildings and stuck it right in the middle. I figured that that would make the building near useless for him and I could use it to block LOS. Atypical Tau player took the other building and stuck it in the far corner, as for the rest of the terrain it was placed rather evenly around the rest of the board as to fill up the rest of the space. The damage was done.
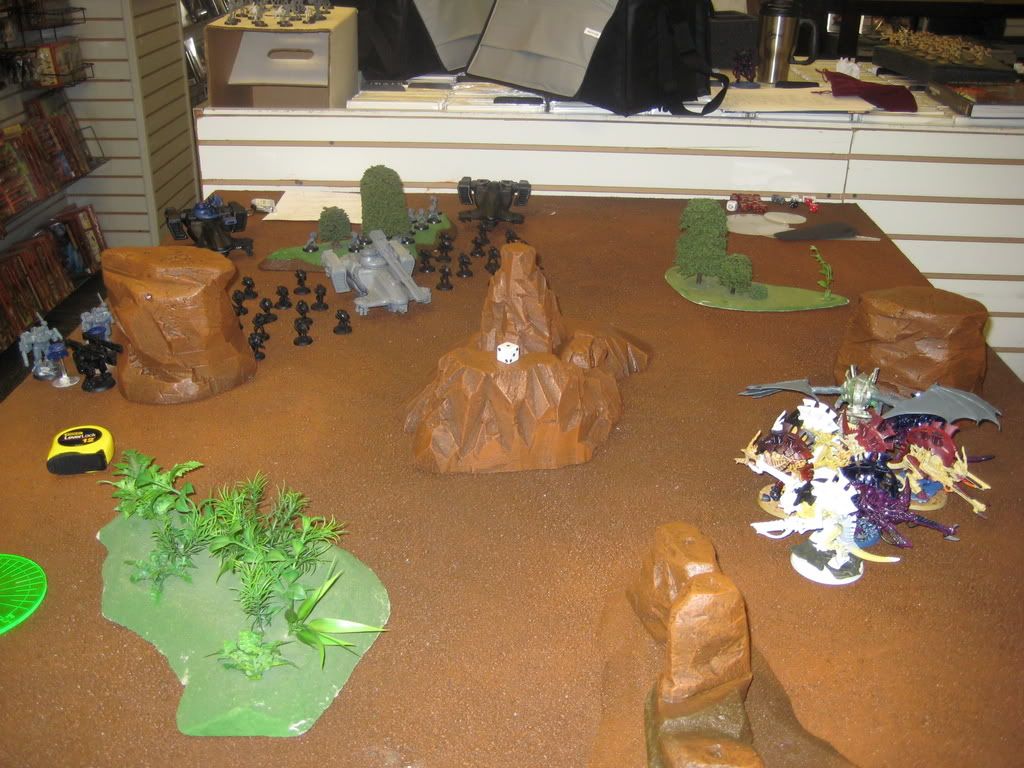
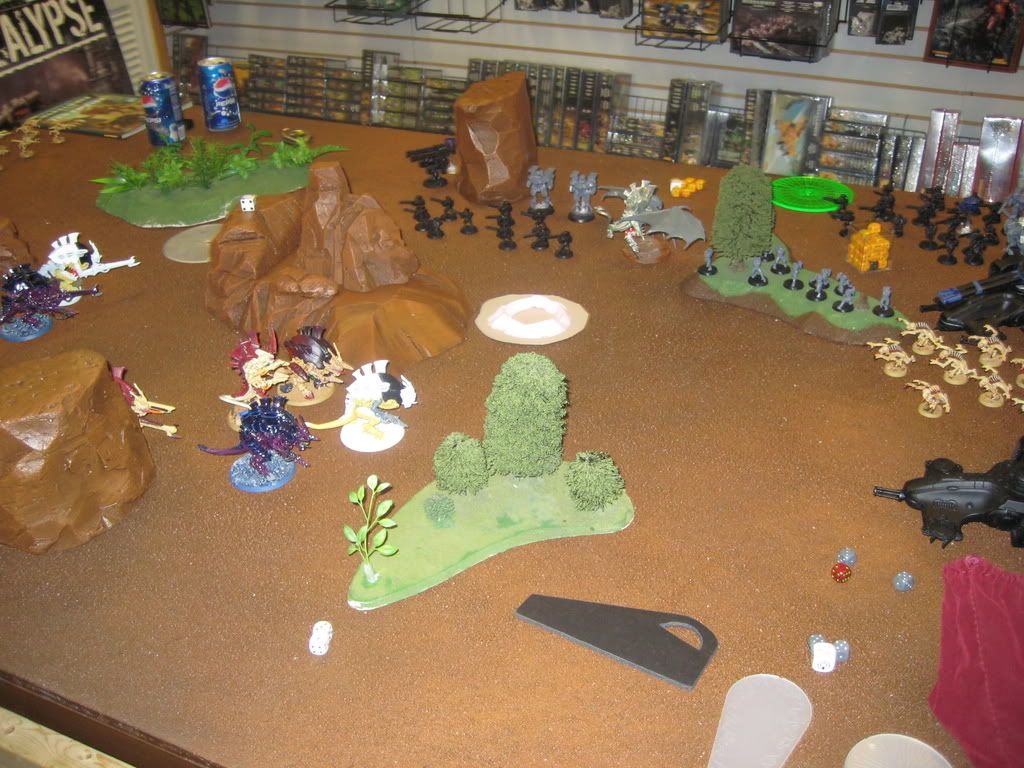
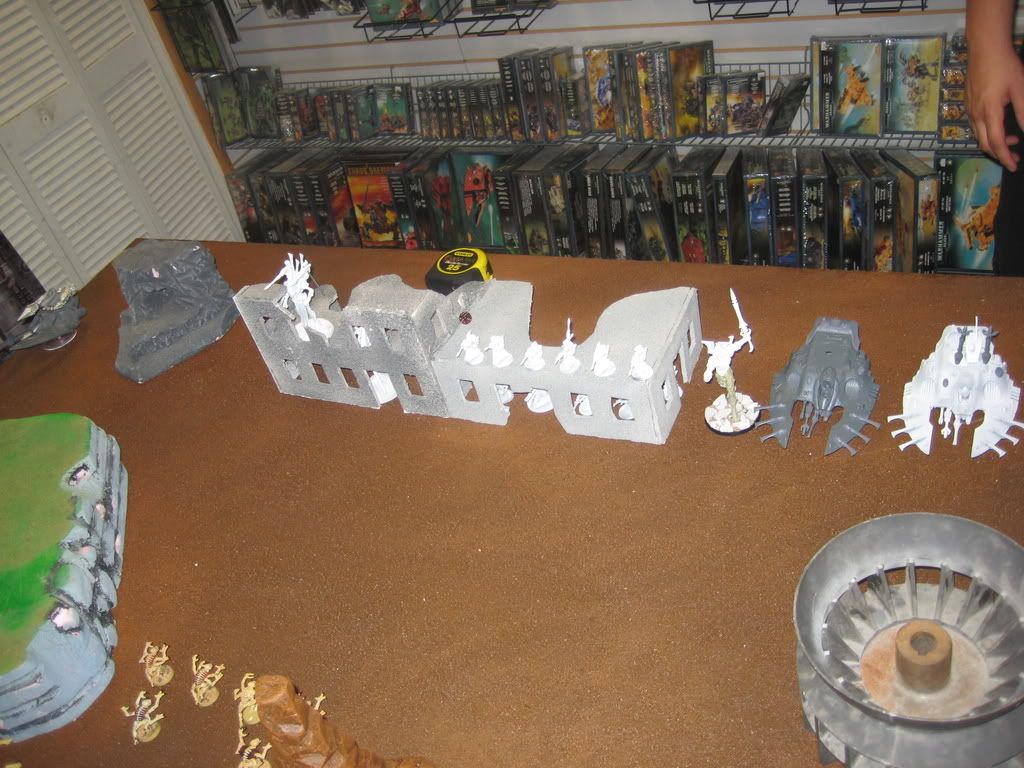
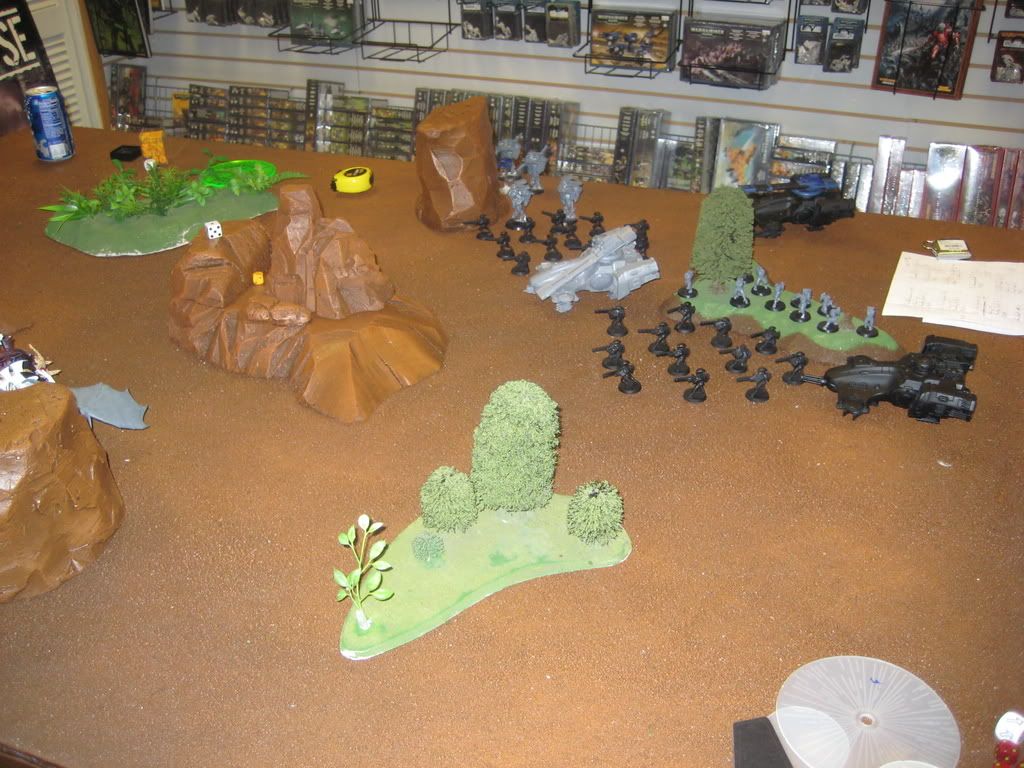
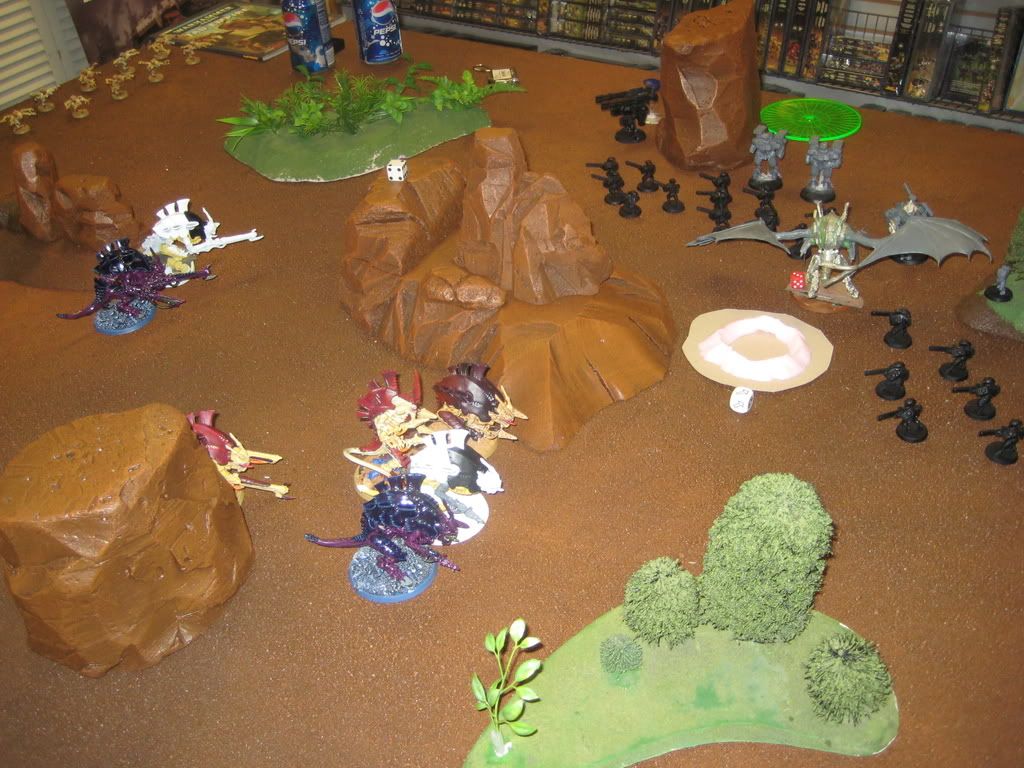
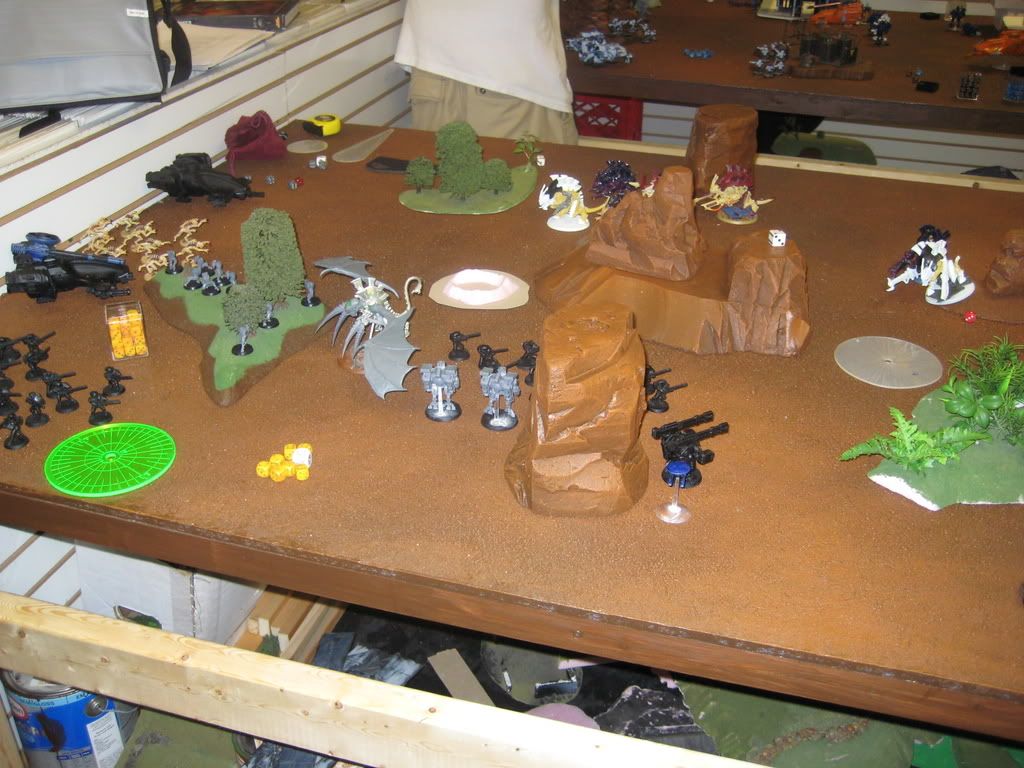
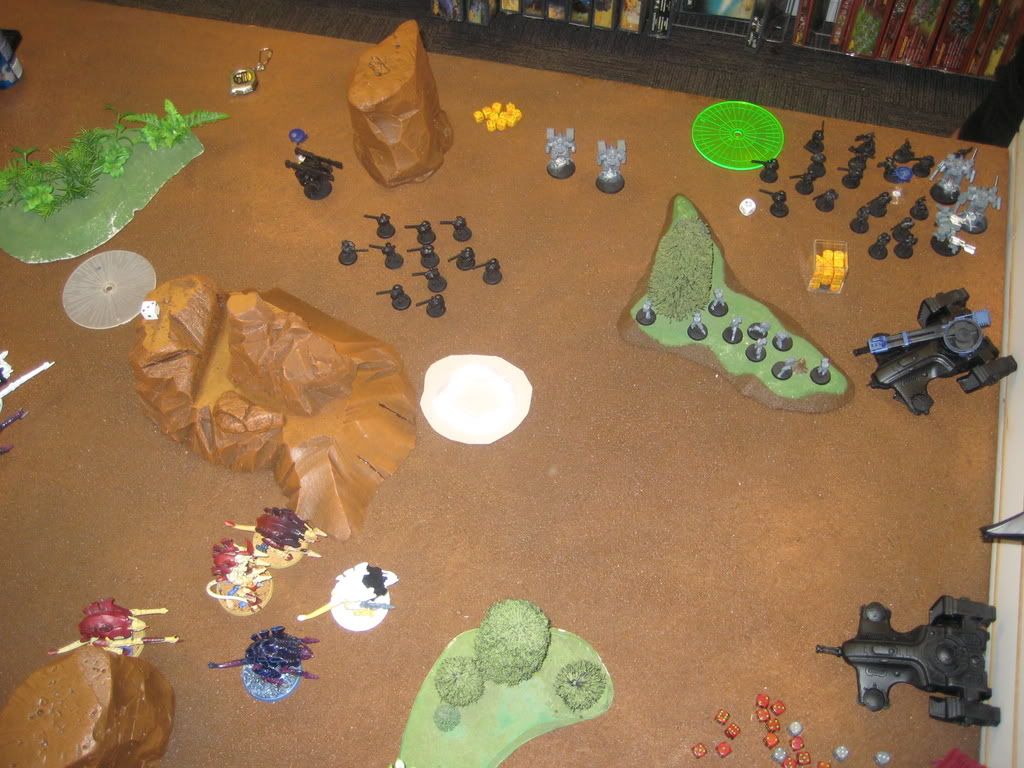
As I don't have a before placement shot this is the best one I can provide for how the terrain was:
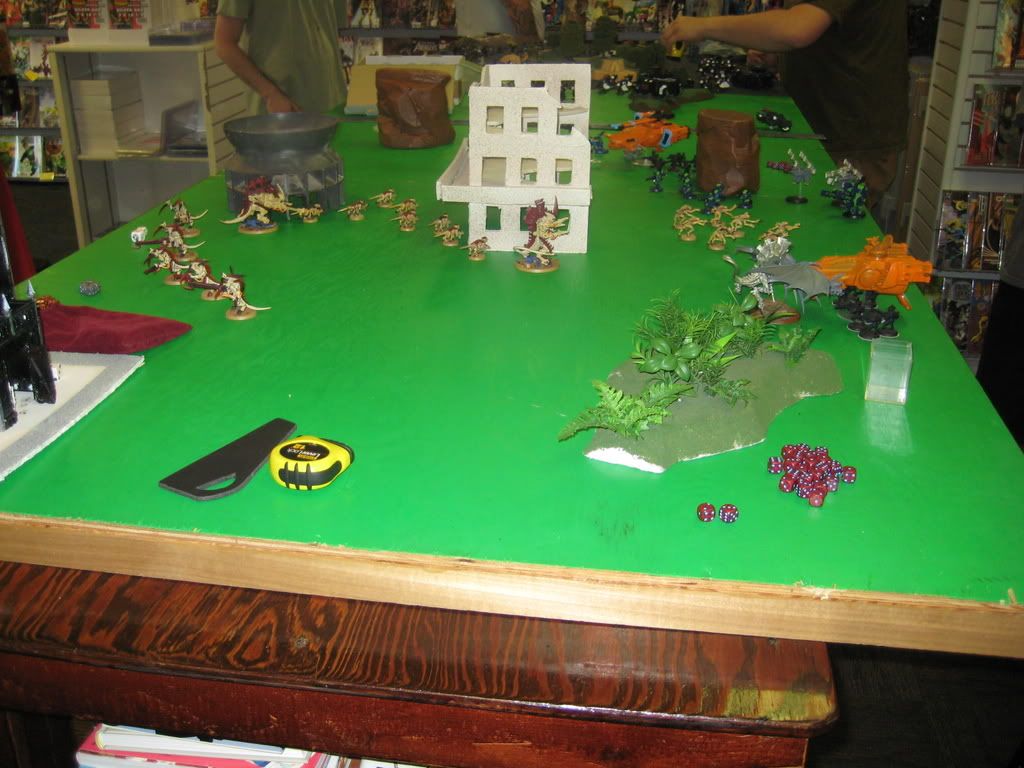
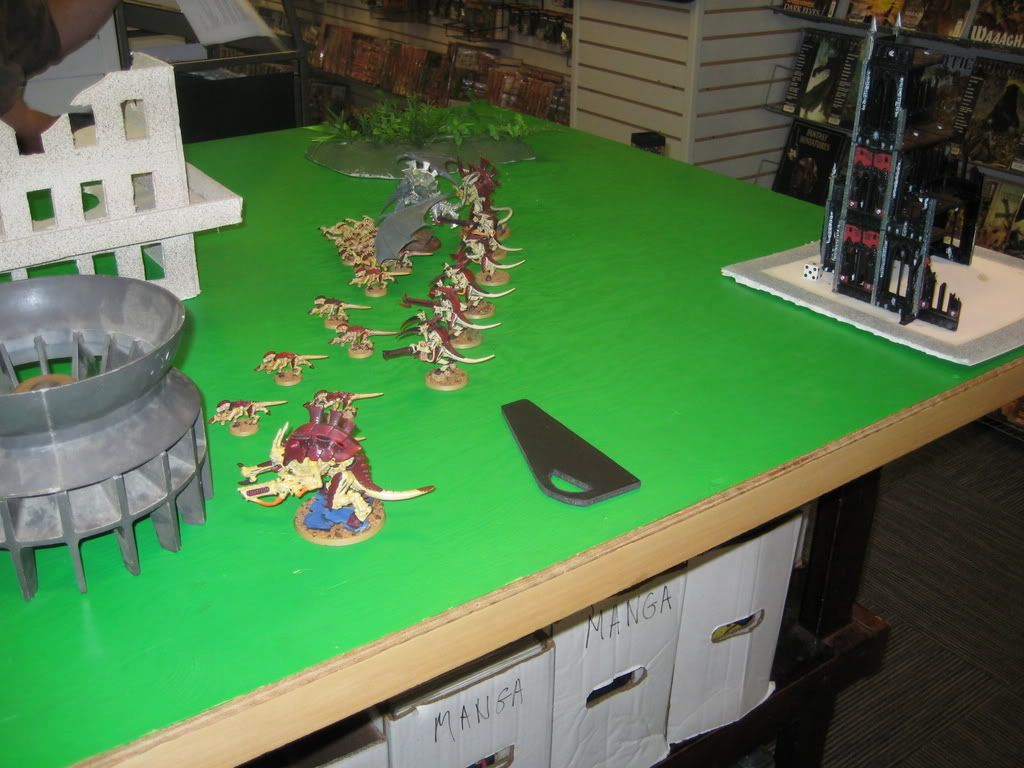
Tyranid:
As you can see, the building in the center blocked LOS on things and if you couldn't tell already I won first turn and took it as well as the side that he had placed the building on. As for actual deployment I basically screened my warriors with my Gaunts, stuck a squad of Genestealers as close as possible in hopes that they would be bait, put the Scything HT as bait and as close as possible to absorb some firepower and get into contact with what would hopefully be a close tank, and the Carnifex sort of out of sight (mind you not out of LOS but kinda in the back so less thought was payed to it.
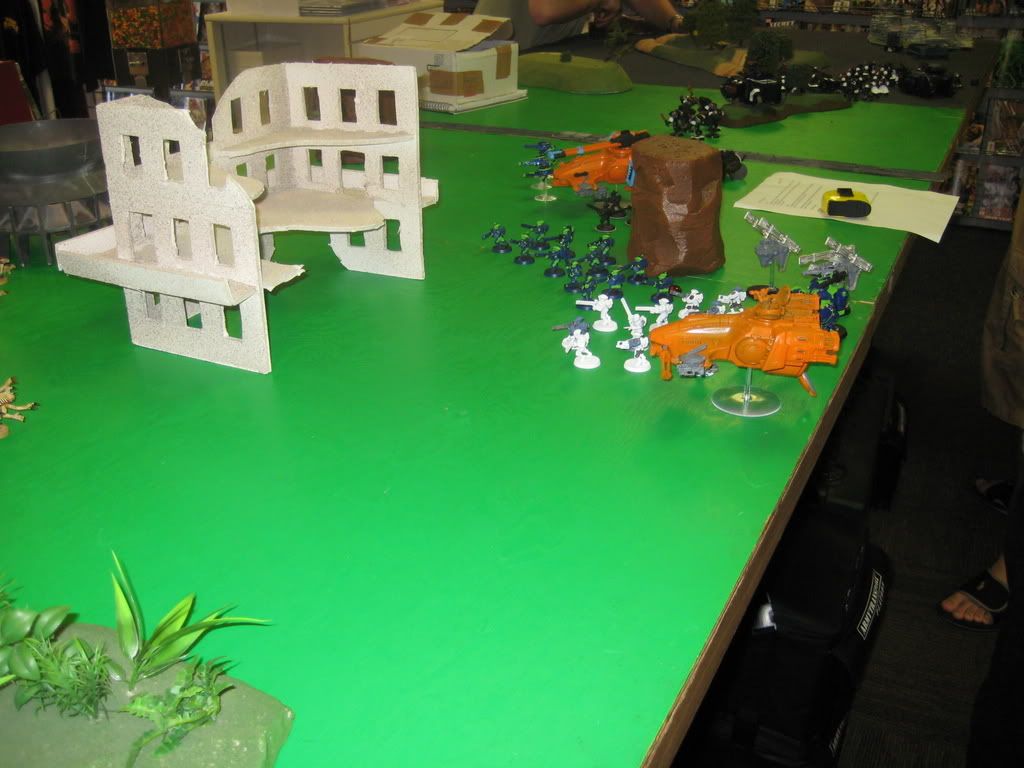
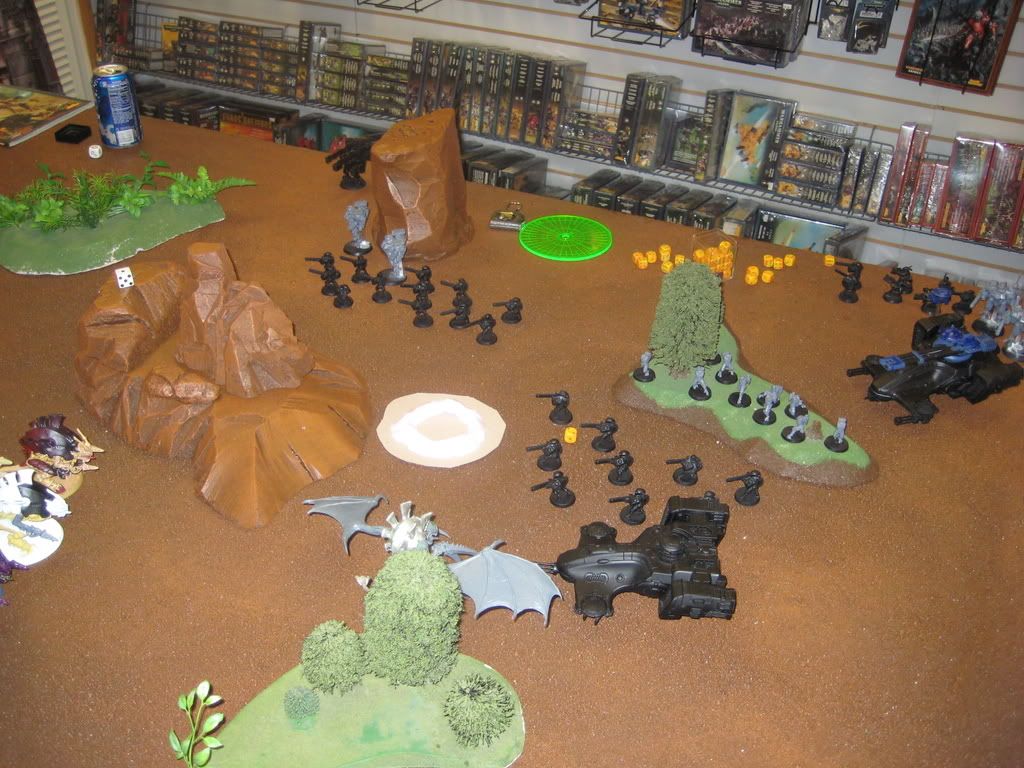
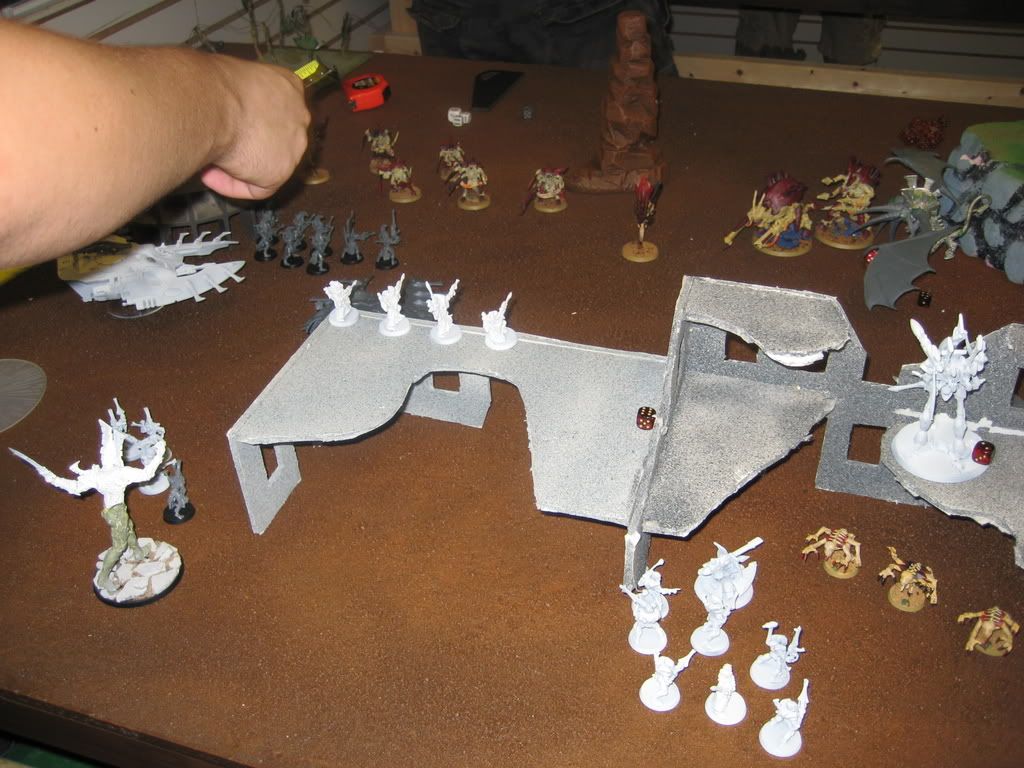
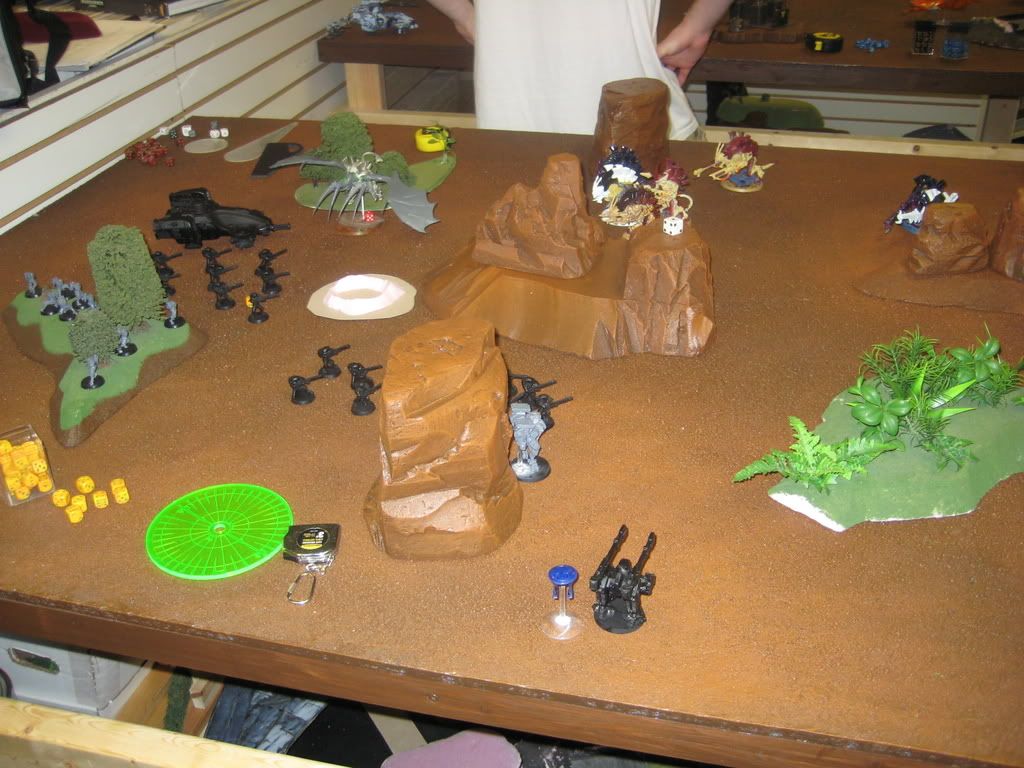
Tau:
I don't think it was intentional, in fact I know it wasn't, but I think the placement of the Tau was probably one of the worst ideas ever. Fully knowing that I had a squad of Genestealers with Scuttlers (thus having the scout rule) he placed a squad of Firewarriors right on the edge of the possible deployment zone. As well as most of his units also being as close as possible. There were the broadsides in the back, sniper drones off to the side and tanks also to the side, however they were all still almost as close as humanly or xenosly(??) possible.
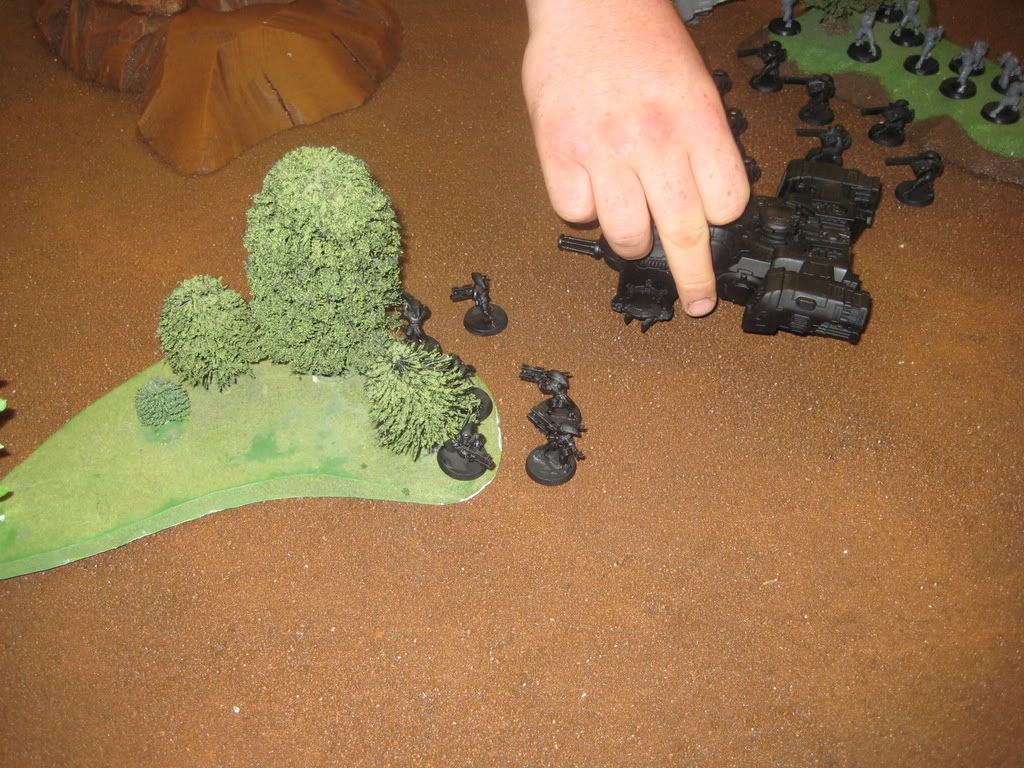
Scout moves:
So what would you do if you had a scout move with a tank that was near a flying Hive Tyrant with Scything Talons? I would suggest you move away but hell if you want to move closer Mr. Tau feel free I'll take the free first turn assault. Oh and did I mention the Fire warriors being really close to the Genestealers that had a scout movement? I will give him his best move of the game Infiltrating Kroot right behind me in that building that I stole from him.
Turn One
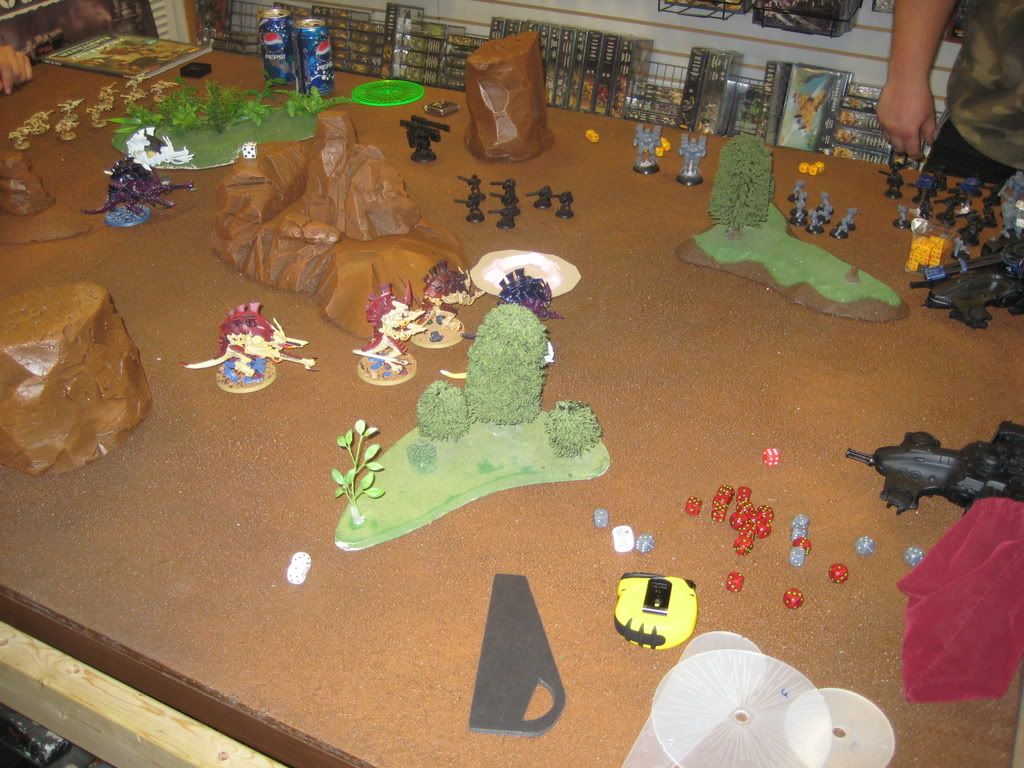
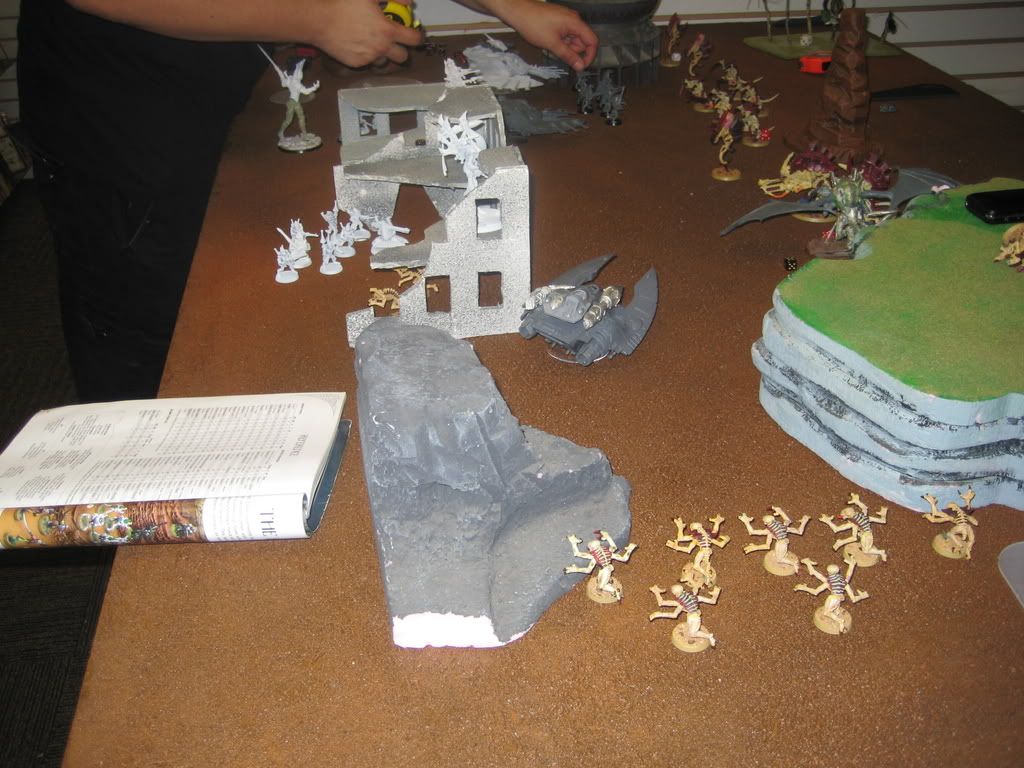
So this was the beginning of the end right here. During the shooting phase I wounded some of the Firewarriors across from the Carnifex with the Barbed Strangler and he failed a pinning test. Thus one squad of Firewarriors was useless. The Warriors mowed down some of the Kroot in the building behind them sadly I didn't kill them all as that would have made the game end far sooner. The Dakka Tyrant also did some damage to the previously mentioned Firewarriors knocking them down a bit as well. I used Run to move the Gaunts and then proceeded to enter Assualt.
Remember those two REALLY bad things I said the Tau player did? Yea, Assault first turn with a Devilfish and with a squad of Firewarriors. Now the Devilfish had Scouted 12" thus I needed Sixes to hit it lucky for me I managed to stun the thing with my Flying HT. As for those Genestealers, they assaulted the Firewarriors. Best part is, I only scored One... ONE wound on them. But, I saved the two wounds that they got on me and won combat. Now apparently Tau can't make a LD test to save their lives... literally and they failed and then failed their sweeping advance check. So once again. ONE wound from Genestealers on a 12 man squad of Firewarriors = 12 Firewarriors off the table.
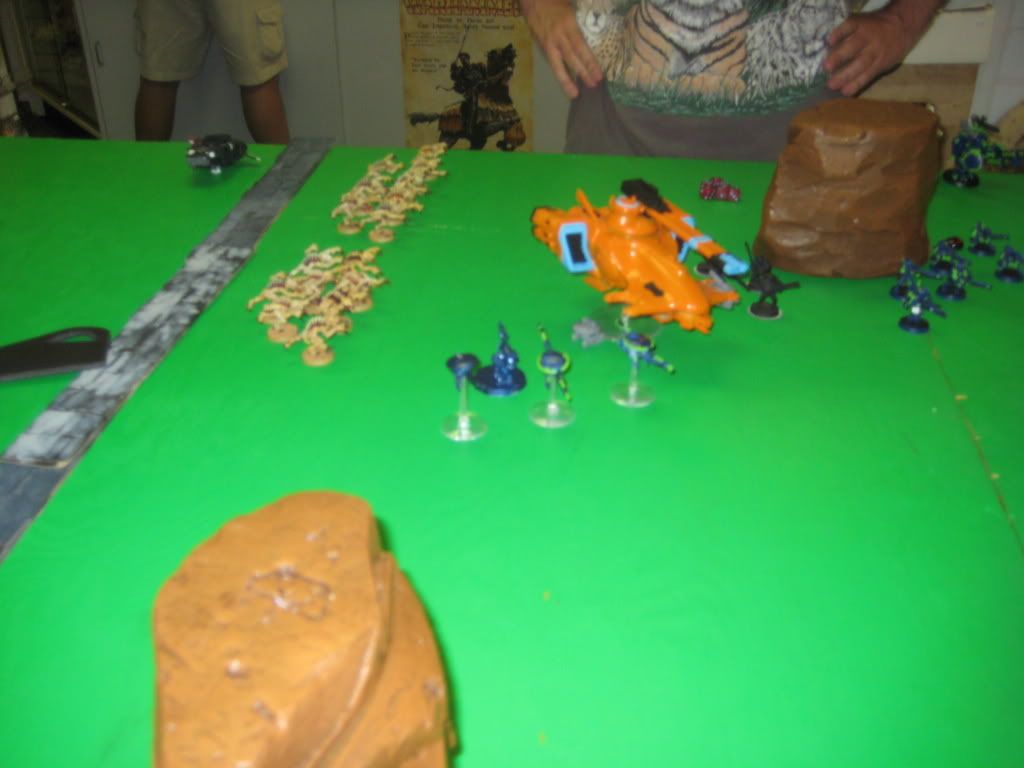
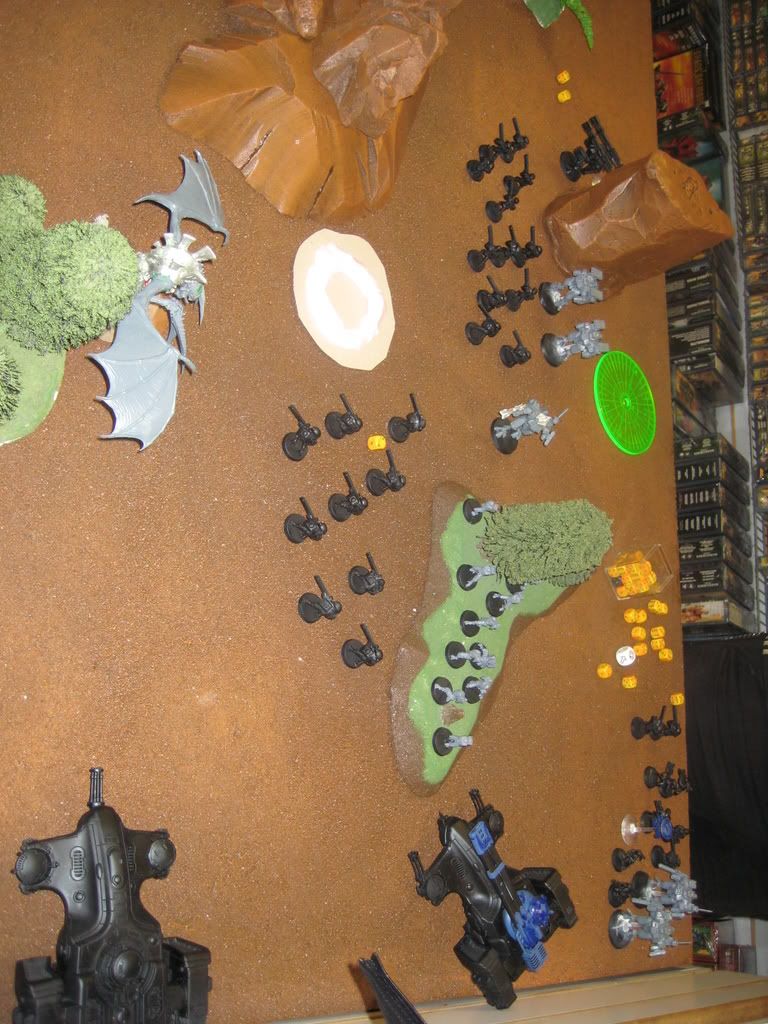
The Tau players turn was... unimpressive I think he got a wound or two on the Flying Tyrant. Oh and during his movement he deployed the squad from in the Devilfish, I think Pathfinders, and instead of moving to the Genestealers to shoot them up with Rapidfire he moved away and was stuck shooting at the Hive Tyrant. That's all folks.
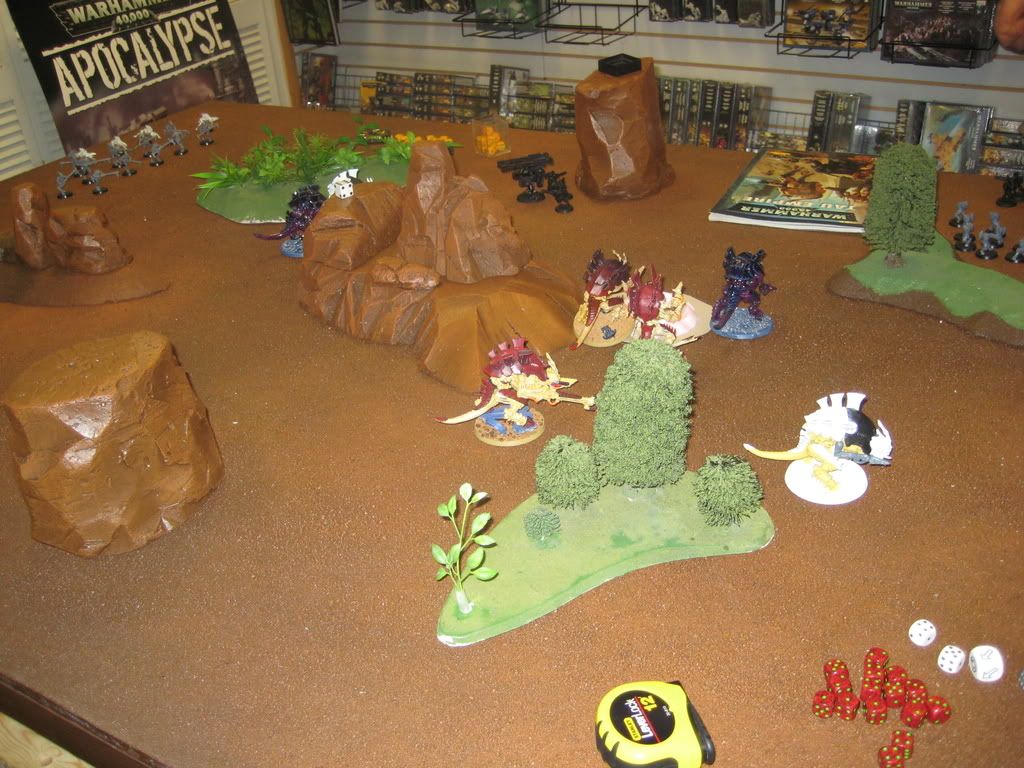
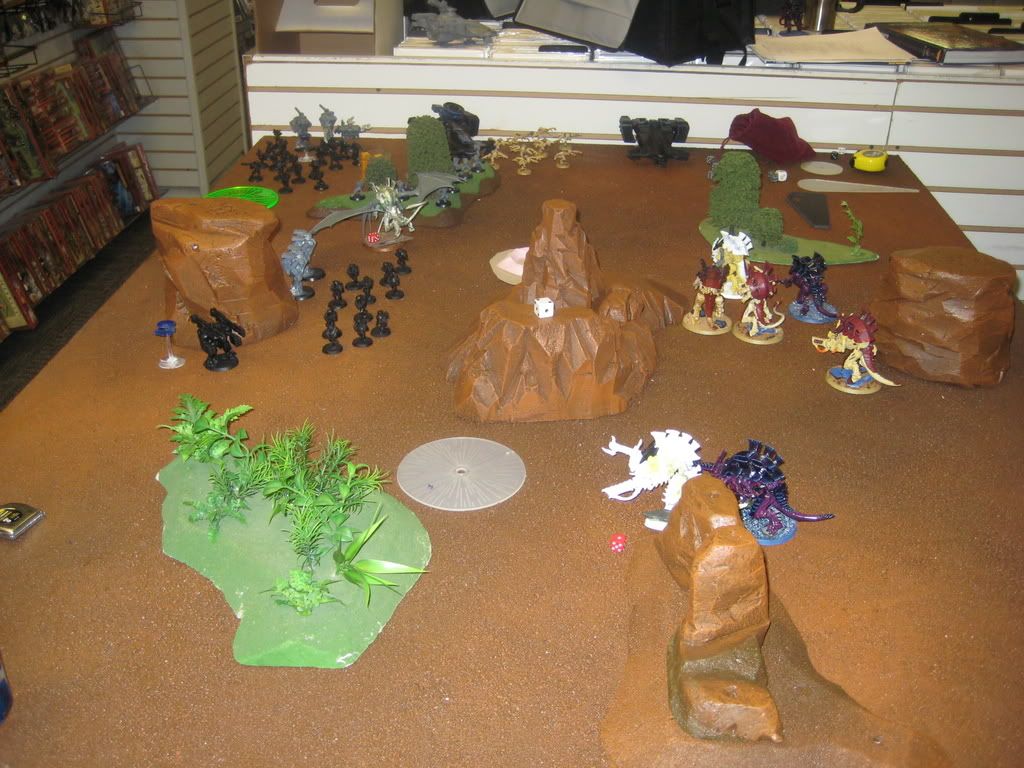
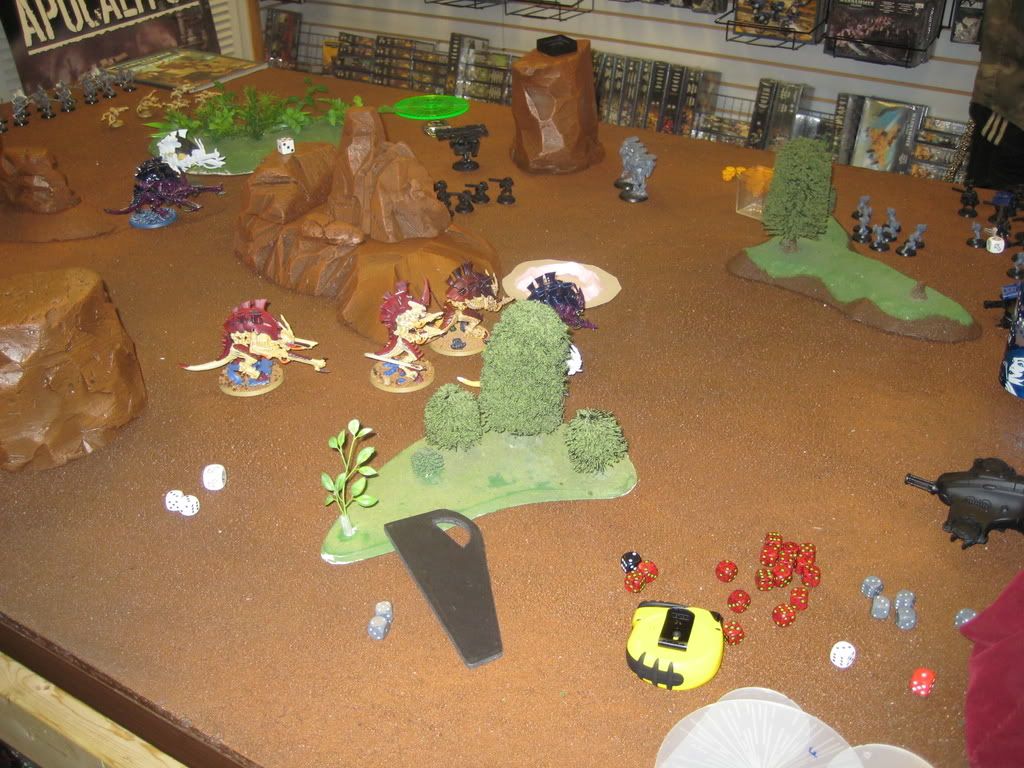
Another image Here.
Turn Two. And Beyond!
So as to save myself the grief of reliving this game in full detail I will recall the events of the rest of the game in a quick manner. However I will let you see why the game ended on turn two.
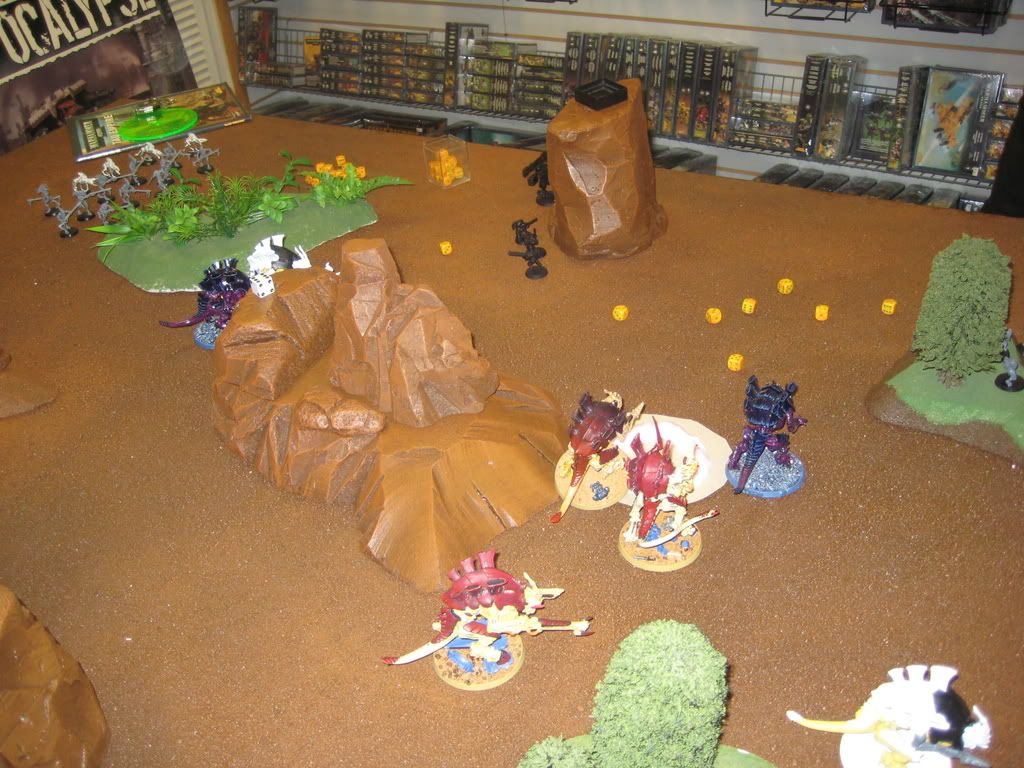
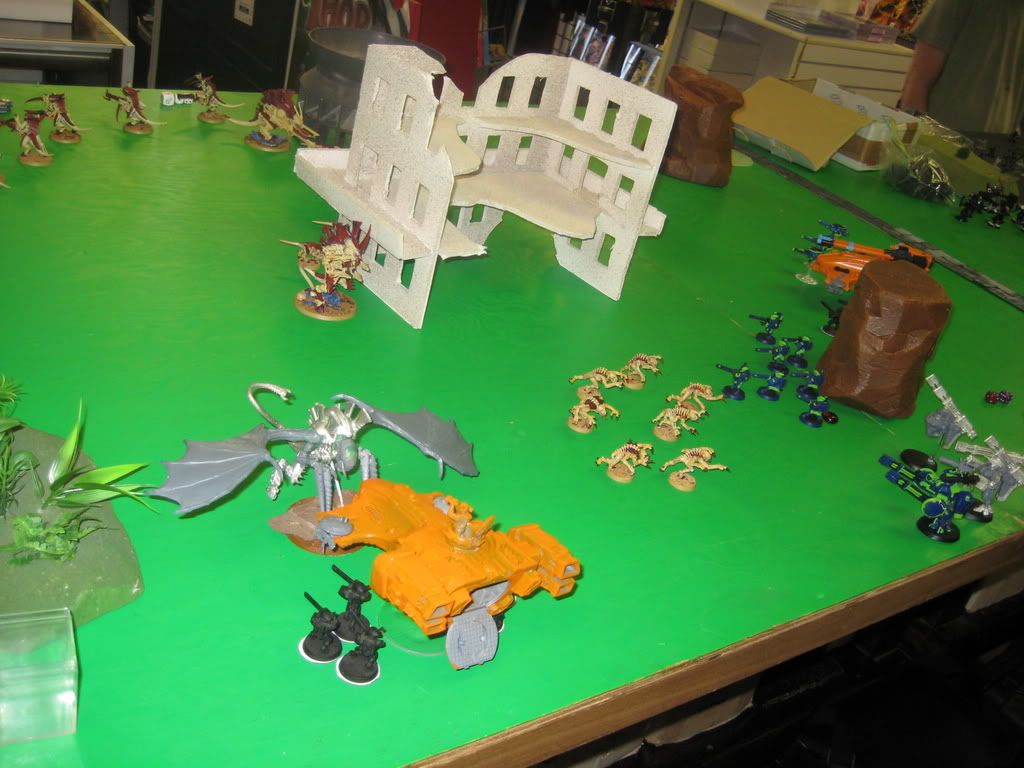
Reserves:
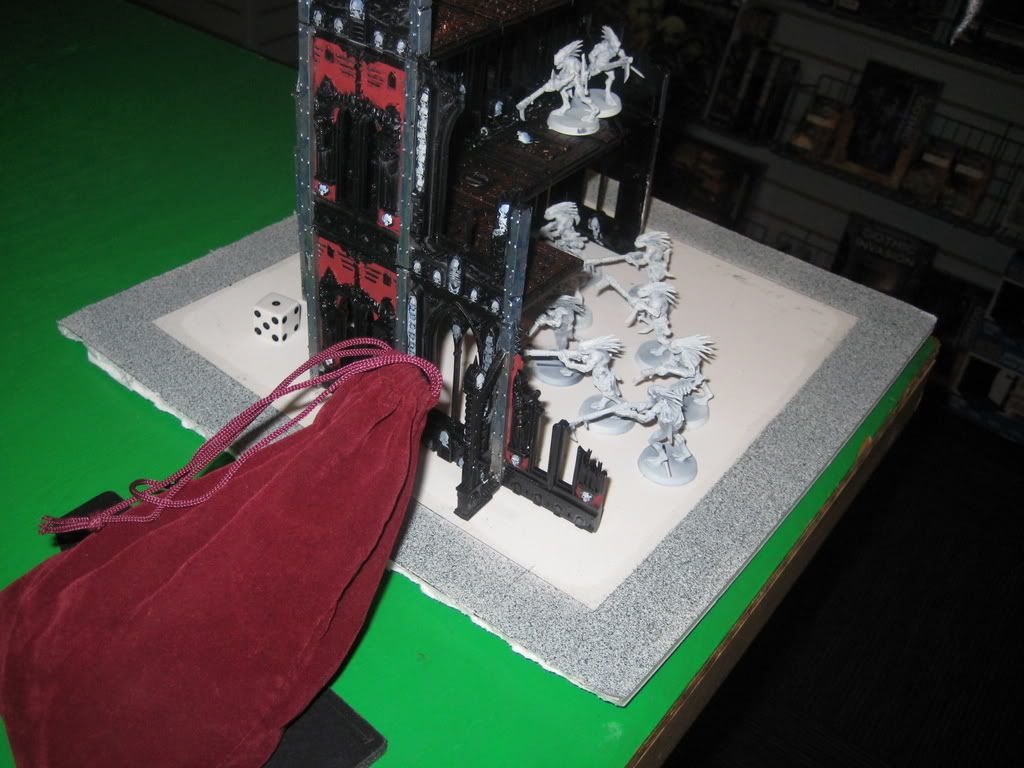
Two Squads of Genestealers and my Lictor came out.
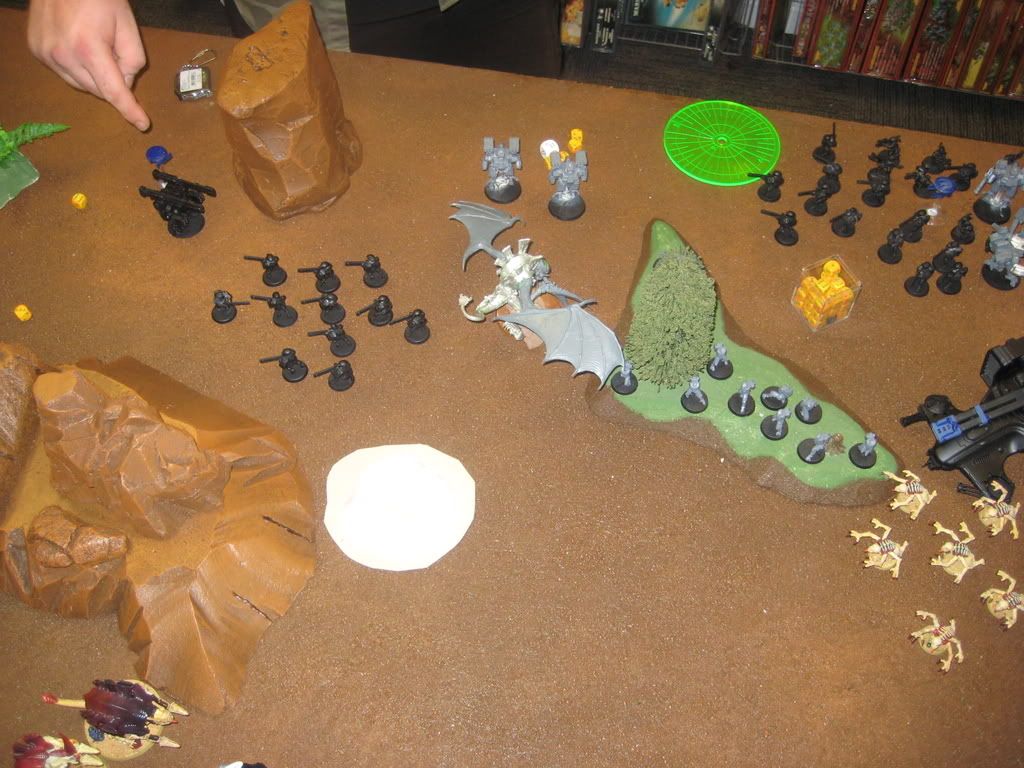
Lictor can sorta be seen here in the corner of the building.
Week 6 was a Win though it was not fun. So far... 5-1-0 Win-Tie-Loss. If you have been following along then you would know that I have been tied with another guy in the tournament for the entire time and our only tie is to each other. He didn't make it to this past Sundays game and I'm friends with the guy that he is playing his makeup game with. So as of now I have no Idea if were still tied or if I'm in the lead now....
Go Dan!!! Push me ahead!:-P
Tyranid Army
HQ:
Hive Tyrant - Enhanced Senses, Extended Carapace, Toxin Sacs, TL-Devourer(x2)
Hive Tyrant - Toxin Sacs, Winged, Scything Talon(x2), Warp Field
Elite:
Lictor
Warrior Brood - 5 Toxin Sacks, Scything Talons, Deathspitters
Troops:
Genestealers - 7 Scuttlers, Acid Maw
Genestealers - 7 Scuttlers, Acid Maw
Genestealers - 8 Scuttlers, Acid Maw
Genestealers - 8 Scuttlers, Acid Maw
Gaunt Brood - 8 Spine Fists, Without Number
Heavy Support:
Carnifex - Enhanced Senses, Reinforced Chitin, Barbed Strangler, Venom Cannon
Total Cost: Under 1500
*Forgive me for the lack of list*
Tau Army
*I refuse to figure it out. Do NOT emulate this guy*
Deployment
In typical Tau fashion when we went out to get terrain he came back with buildings, as you will see, and I came back with random stuff that was left over after everyone used up all the other terrain. I won placement of the first terrain piece so I took the larger of the two buildings and stuck it right in the middle. I figured that that would make the building near useless for him and I could use it to block LOS. Atypical Tau player took the other building and stuck it in the far corner, as for the rest of the terrain it was placed rather evenly around the rest of the board as to fill up the rest of the space. The damage was done.
As I don't have a before placement shot this is the best one I can provide for how the terrain was:
Tyranid:
As you can see, the building in the center blocked LOS on things and if you couldn't tell already I won first turn and took it as well as the side that he had placed the building on. As for actual deployment I basically screened my warriors with my Gaunts, stuck a squad of Genestealers as close as possible in hopes that they would be bait, put the Scything HT as bait and as close as possible to absorb some firepower and get into contact with what would hopefully be a close tank, and the Carnifex sort of out of sight (mind you not out of LOS but kinda in the back so less thought was payed to it.
Tau:
I don't think it was intentional, in fact I know it wasn't, but I think the placement of the Tau was probably one of the worst ideas ever. Fully knowing that I had a squad of Genestealers with Scuttlers (thus having the scout rule) he placed a squad of Firewarriors right on the edge of the possible deployment zone. As well as most of his units also being as close as possible. There were the broadsides in the back, sniper drones off to the side and tanks also to the side, however they were all still almost as close as humanly or xenosly(??) possible.
Scout moves:
So what would you do if you had a scout move with a tank that was near a flying Hive Tyrant with Scything Talons? I would suggest you move away but hell if you want to move closer Mr. Tau feel free I'll take the free first turn assault. Oh and did I mention the Fire warriors being really close to the Genestealers that had a scout movement? I will give him his best move of the game Infiltrating Kroot right behind me in that building that I stole from him.
Turn One
So this was the beginning of the end right here. During the shooting phase I wounded some of the Firewarriors across from the Carnifex with the Barbed Strangler and he failed a pinning test. Thus one squad of Firewarriors was useless. The Warriors mowed down some of the Kroot in the building behind them sadly I didn't kill them all as that would have made the game end far sooner. The Dakka Tyrant also did some damage to the previously mentioned Firewarriors knocking them down a bit as well. I used Run to move the Gaunts and then proceeded to enter Assualt.
Remember those two REALLY bad things I said the Tau player did? Yea, Assault first turn with a Devilfish and with a squad of Firewarriors. Now the Devilfish had Scouted 12" thus I needed Sixes to hit it lucky for me I managed to stun the thing with my Flying HT. As for those Genestealers, they assaulted the Firewarriors. Best part is, I only scored One... ONE wound on them. But, I saved the two wounds that they got on me and won combat. Now apparently Tau can't make a LD test to save their lives... literally and they failed and then failed their sweeping advance check. So once again. ONE wound from Genestealers on a 12 man squad of Firewarriors = 12 Firewarriors off the table.
The Tau players turn was... unimpressive I think he got a wound or two on the Flying Tyrant. Oh and during his movement he deployed the squad from in the Devilfish, I think Pathfinders, and instead of moving to the Genestealers to shoot them up with Rapidfire he moved away and was stuck shooting at the Hive Tyrant. That's all folks.
Another image Here.
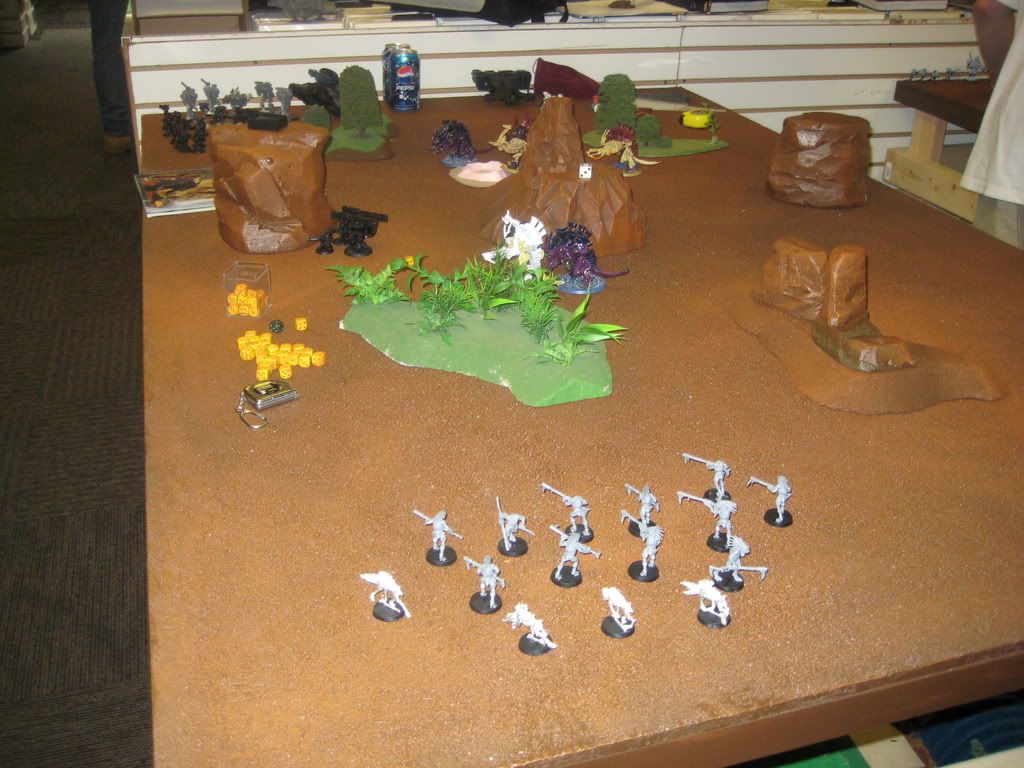
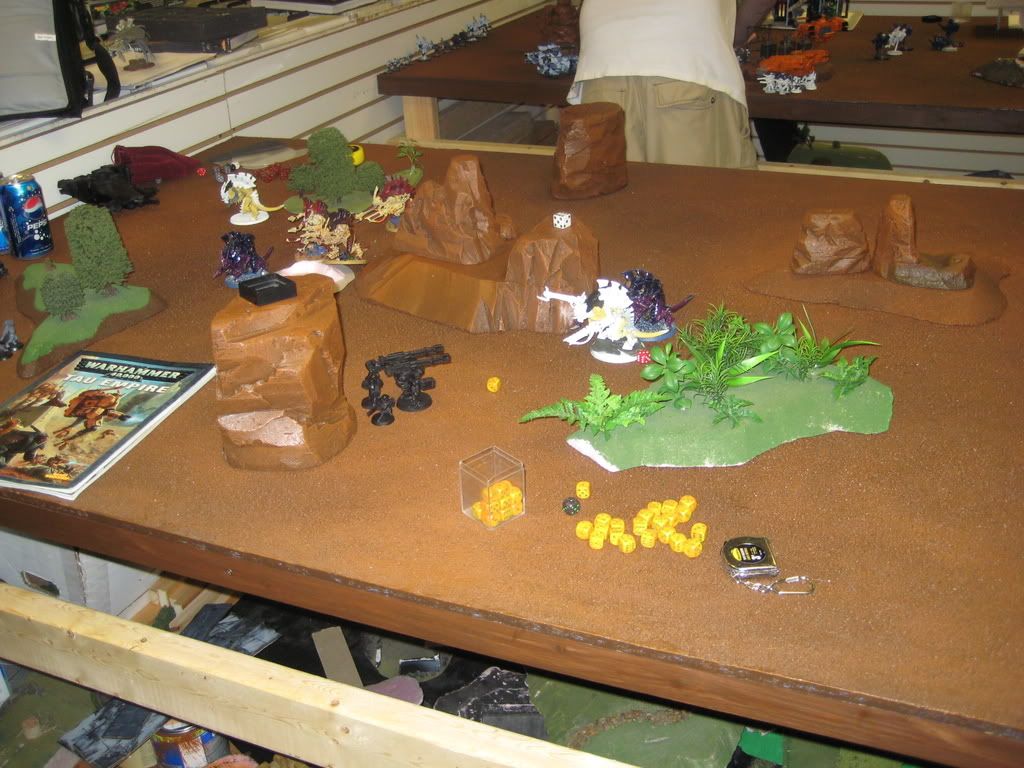
Turn Two. And Beyond!
So as to save myself the grief of reliving this game in full detail I will recall the events of the rest of the game in a quick manner. However I will let you see why the game ended on turn two.
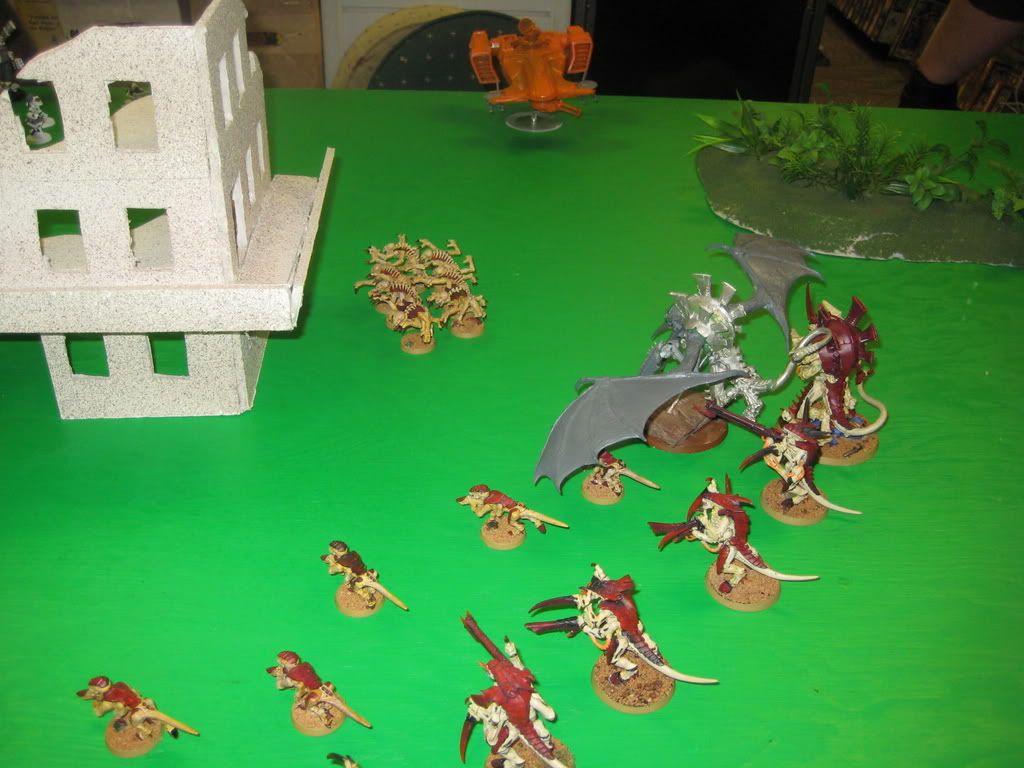
Reserves:
Two Squads of Genestealers and my Lictor came out.
Lictor can sorta be seen here in the corner of the building.
Week 6 was a Win though it was not fun. So far... 5-1-0 Win-Tie-Loss. If you have been following along then you would know that I have been tied with another guy in the tournament for the entire time and our only tie is to each other. He didn't make it to this past Sundays game and I'm friends with the guy that he is playing his makeup game with. So as of now I have no Idea if were still tied or if I'm in the lead now....
Go Dan!!! Push me ahead!:-P


