Friday, July 30, 2010
Promised Update
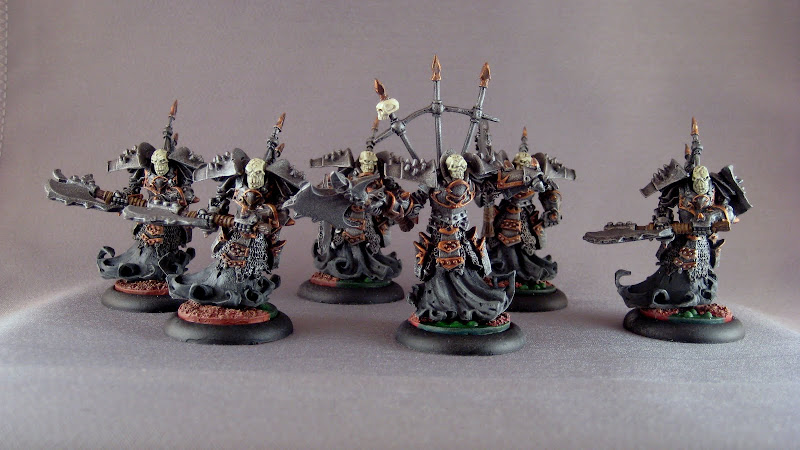
So like I said I did get the Bane Thralls done the other day I just didn't have the time to take pictures of them but now they are below. I also included my currently WIP of the Warwitch Siren as well as the project after the rest of the Cryx are finished, the almost done WIP Trygon.


Thursday, July 29, 2010
Char
So this week has been... Interesting.
Hobby wise not that much has happened I did get some painting done while not much I'm on my way to having the Cryx Army complete so I can start working on other projects, after that I think I'm going to finish the Trygon right after the Cryx just because it's almost done, and then I have to decide what to do from there. I did get some painting done on all of the Terrain that I have from my commission. It was heavily delayed thanks to no airbrush for a week plus the guy that I'm doing it for isn't going to be around for a week or so thus I have extra time now, not that I ever had a time frame.
I did also get a game of 40k in. I got to play my Sisters of battle against Necrons in the "Kele" campaign that I am currently in. It was a planet strike mission and I was heavily fortified in a defensive position. I think the game was decided before we even began as I ended up with 650 more points to start the game with vs an army of only Warriors, Scarabs, and Tomb Spiders since thats how this phase of the "neutral" Necron assault starts. Was fun and a good time but I almost feel bad when a game is that heavily weighted.
As for OTHER things going on. The thing that has been taking all of my time for the past few days has been Starcraft 2 so that has been sucking my soul and honestly it probably will do that for quite some time since its an amazing game. Then there was some personal stuff that happened which sucks relating to jobs but whatever.
I will try to get some pictures of the Bane Thralls tonight and post those hell maybe I can get some painting in after that as well. On another note related to the Sisters army I due to the personal stuff I was unable to purchase the Battlefoam bag recently during the Golden Boota day so I still have no army transport for them but before that occurred I found someone selling 3 Penitent Engines, snagged those, and someone selling some FW Repressor Kits and got those for a nice little discount. So I am well on my way to getting the sisters moving on the battlefield.
Thursday, July 22, 2010
So since I last posted I did my best to hammer out as much as possible. I managed to finish the Bane Thralls however I did not take any pictures of that. I also painted my Cryx Leader up Iron Lich Asphyxious after spending the better part of Wednesday on him.
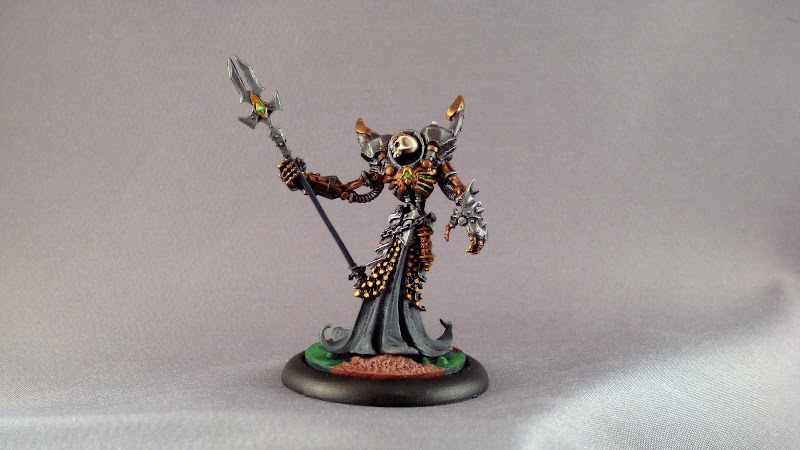 I had this squad sitting around as well figured I would toss them up on coolminiornot.com most of the pictures i put up there are available for viewing under the same id Ivellos.


Monday, July 19, 2010
The Pile on the Desk
So I have a TON of stuff sitting on my desk waiting to be painted. I'm not there right now but this is a list of the things I can remember that I have. I'm going to put this list on the side of the page and keep it updated as best I can for what I have painted.
Warmachine
Cryx
Iron Lich Asphyxious
Deathripper
Classic Reaper
Seether
6 Bane Thralls
Warwitch Siren
Khador
Forward Kommander Kratikoff
Kommander Sorscha
Kommander Orsus Zoktavir
Kommander Strakhov
War Dog
Classic Juggernaut
Classic Destroyer x3
Kodiak
Beast-09
Mechanik Chief & Assistants
Iron Fang Pikemen
Iron Fang Pikemen Officer & Standard Bearer
Widowmakers
Kossite Woodsmen Unit
Kayazy Assassin Unit
Kayazy Assassin Underboss
40K
Dark Angels
Dark Angels Master of the Ravenwing
Witch Hunters
Witch Hunter Inquisitor Lord & Retinue
Witch Hunter Henchmen
Witch Hunter Inquisitor
Celestine the Living Saint
Witch Hunters Imperial Confessor Kyrinov
Witch Hunters Imperial Missionary Jacobus
Sisters of Battle Canoness x3
Witch Hunters Preacher
Sisters Repentia x18
Witch Hunters Callidus Assassin
Arco Flagellants x6
Battle Sisters 6 Squads of 10
Sisters of Battle Seraphim 3 Full squads
Sisters of Battle Exorcist FW Models
Lots of Others Like Heavy Weapons
Fantasy
Skaven
3 Boxes of Clanrats
Warpfire Thrower
2 Skaven Warlock Engineer
Skaven Doomwheel
Labels:
Cryx,
khador,
painting,
sisters of battle,
skaven,
witch hunters
Saturday, July 17, 2010
Friday, July 16, 2010
New Scheme Needed!
On another note I finished up all of the objectives/strategic tokens that I was working on and started to finish the Bane Thralls that I have had sitting around. Below are some pictures that i took quickly with my cell. While not of good quality it gets the idea across.
Thursday, July 15, 2010
Airbrushing 102

With some of the basics over with I am going to probably have another post or two on any other information I can compile and possibly help people with as well as just have some opinions as well.
So were going to start with my setup recommendations.
Airbrush - In general I would suggest starting with a dual-action top feeding airbrush. Why do I suggest this? The target audience for this blog is 40k and miniature war-gamers and were going to want to use the colors that we are used to thus hobby paints which are generally thicker. So we having gravity help us with getting our thinned paints through our brush is quite nice. Also for us having a dual action brush with let us do fine detail for cool bits and also we can go full blast and base coat.
Air - Get a compressor! Quiet or not you want to get a compressor even if you put down a good deal of cash its worth the constant and in the end free air that you get. There are a few things you should consider about a compressor as well though most of what I mentioned already but were going to cover it all and a little more real quickly.
 Moisture Trap - There are two kinds, attached to the compressor and inline, it really doesn't matter which in my opinion but you need one. Moisture traps stop any water from getting out and into your line, airbrush, and thus onto your art. If you don't have a moisture trap water will eventually build up in the line and pass through the airbrush. When the water comes out your paint will spurt and be far too watered down and it will literally spit water downed color.
Regulator - Not as needed but still useful and often connected to the moisture trap. This will let you change the pressure of the airflow where most of these hobby works are done at 15-25 psi there are some people who work even higher. In the end unless you have a compresses that only works at 15 or 20 psi you should probably have a regulator so you can change the psi per application. Lucky for us most compressors come with one built in.
PSI - Speaking of psi like said above you will probably be working in a range of 15-25 but possibly even 10-35 or even further out. You do not want to be working on 100 psi even if your compressor can put that out its just too much. In the end you probably want to get something that can put out a consistent 35 psi just to cover all your bases.
Extras - As with most hobbys there are also things you don't need but are helpful to have and I wanted to help people find some of the ones I have found useful so far.
Quick Disconnect
This is a great little addition so you can just pop the airbrush off and bring it to the sink to clean.

Airbrush Stand
Most of us only have 2 hands and thus its hard to hold and airbrush and mix paint and move things around while one has the airbrush in it. Well a desk clamp with a airbrush holder on it is just perfect.
Iwata-Medea Cleaning Station
You can check out the previous Airbrush posts below:Most of us only have 2 hands and thus its hard to hold and airbrush and mix paint and move things around while one has the airbrush in it. Well a desk clamp with a airbrush holder on it is just perfect.

Iwata-Medea Cleaning Station
101 Part 1 - Airbrushes
101 Part 2 - Air
101 Part 3 - Paint
Tuesday, July 13, 2010
Photobox and Markers
Took some more pictures of already painted figures with the new photo box. So just a quick post nice and early in the morning. I will get some work done on the Markers and Part 2 of the Terrain today.
Monday, July 12, 2010
Objective Markers
First we have the 2 already finished squads of Sisters of Battle then the Faith tokens I decided to make out of the rhino door icons. I need a few more of them so that when I run a larger game I can actually keep track of all of them but this should do for now.
Airbrushing 101 - Part 3
 In this section of Airbrushing 101 were going to be looking at the last main part of the equipment the paint.
Paint
This is really a gigantic subject and in no way will I be covering all of it. I will be looking at airbrush specific paints and hobby paints and what you need to do to to make them work with an airbrush. There will be less comparison and this section is slightly different to those that precede it as I am no expert on paint.
Airbrush Paint - This includes Createx, Testors, One-Shot, and even Vallejo Air paints which are all made and formulated to be put through a airbrush. Each brand has different lines intended for different things such as painting cakes, nails, automotive, and t-shirts. They are all formulated f
 or specific applications and while not necessarily for minis most of them will work. The nice thing about these paints is they will either come ready to be pushed through a airbrush or the brand will have some form of thinner they sell that is formulated to go through as a 1:1 or 2:1 ratios. Thus you only need to mix two things with no special formula thus it is quite easy for use. The one fault that these have is they are generally softer than hobby paints (although I would assume Vallejo Air wouldn't have this problem) thus don't take as much wear and tear and will rub or even possibly peel off if they are handled too much however a nice varnish or clear-coat should eliminate that problem.
Hobby Paints - These are the ones that we are all used to painting with on a daily bases and are intended to be applied via a brush. They have far more pigment and generally the pigment particles are larger and coarser than in Airbrush ready paints. Thus even with a paint being thinned well you may run in to problems with clogging more often. This is going to be where you have to work some magic with a nice mix of paint and other additives to get it through the airbrush with as little clogging as possible. People add lots of different things to thin down the paint water, windex, and flow-aid are just some of the things I have seen or heard of people adding to the paint to thin it and make it easy to push through the airbrush.
 Ink/Washes - Not really "paint" but ink and washes are great for quick shading. Its almost the same as when you do it by hand but at the same time quite different. If you use ink and washes already then you should know how to use them. Nice thing for them is you can dilute them with something like matte medium or even water to get them down lighter than they were and possibly add other properties as well. Shading can also be done in other methods such as "pre-shading" but those are techniques that could possibly covered later.
While the above is mostly general information I do hope its somewhat informative. Possibly later on I can discuss more specifics such as how I mix my paint and how others do it as well. Maybe even some techniques that can be used to achieve better results.
Sunday, July 11, 2010
Airbrushing 101 - Part 2

In part two of Airbrushing 101 were going to continue looking at the Equipment involved more specifically the Air and how you get it to your airbrush.
Air
There are a few different tools to use for air to push the paint out of your airbrush while all end up being expensive I will explain what they are how they work and what it means for cost.
Canned Air - Exactly what it sounds like, this is a can of compressed air that you can connect to your airbrush. This starts out as a low investment at 6-10 bucks a can for the larger cans but over time this will add up quite quickly. This method also comes with the problem of pressure not being consistent. This is due to not just the can losing pressure but also because as the air comes out it causes the can to get extremely cold and thus the can loses internal pressure.
Compressor - This is a large subject and there are multiple things to consider when looking at compressors.
Tank vs. No Tank - A compressor without a tank is going to be running the entire time you use it constantly working to get the air flowing. This can be a bad thing it will cause the compressor to always be warm thus generating moisture more consistently. Also this constant working means that the machine is pulsing air opposed to streaming air. That constant pulse can show up on your work under the right (or wrong) conditions thus your paint flow wont be as consistent as it could be. There is a plus however, a compressor without a tank is generally quite less expensive. Having a Tank eliminates most of the problems you can have that I mentioned the airflow will be more consistent and because of less heat being generated there is less of a build up of moisture, which is an issue that we will tackle another time. Noise - This is a huge issue for some people and for others its not a big deal at all. This is really going to end up being a cost related problem. You can buy a large powerful compressor
from your local do it yourself store (Home Depot and the such) for cheaper than $100 and have far more power than you will ever need but if you live with anyone else or in an apartment they will be far too loud for that environment. As soon as you move to a quite style compressor you will probably double the price for something with far less power and with no tank or any extra bits but it will be use able in the home.
I will be ending with that for today, there are many other things to consider for everything we have covered so far and I plan on going into detail about each part.
Next up will be what to consider with paint.
 Noise - This is a huge issue for some people and for others its not a big deal at all. This is really going to end up being a cost related problem. You can buy a large powerful compressor
from your local do it yourself store (Home Depot and the such) for cheaper than $100 and have far more power than you will ever need but if you live with anyone else or in an apartment they will be far too loud for that environment. As soon as you move to a quite style compressor you will probably double the price for something with far less power and with no tank or any extra bits but it will be use able in the home.
I will be ending with that for today, there are many other things to consider for everything we have covered so far and I plan on going into detail about each part.
Next up will be what to consider with paint.
Saturday, July 10, 2010
Airbrushing 101
 So there are a few things to consider when you want to start out in airbrushing. To start we will begin with just the equipment in which there are 3 main considerations.
Equipment
The most obvious place to start with is the tool that you will be handling and that this is all named after the airbrush itself. There are many different tools that are available from various companies and each is unique in its own way. Were going to go over some generalizations about airbrushes and the types available.
Internal Mix vs. External Mix - The item were going to consider is how the paint and air is mixed. Regardless of the method the point ends up being that we are mixing air and paint together and pushing that paint at something. The most well known external mix airbrush in this community would be the Games Workshop Citadel Spray Gun, while not really being a "real" airbrush it is a great example of external mix just because even at a quick glance you can see it has two parts that meet one that pushes air and one that pulls the paint. External airbrushes generally end up with a coarse and stippled but can also push thicker paint through as well. Internal Mix airbrushes as one would assume mix the paint and air inside of the brush itself causing the paint to be atomized inside the airbrush thus mixing the paint far finer.
Single Action vs. Dual Action - This one thing makes a big difference in what you are going to do with you airbrush. If you are going to base-coat things only then you can get a single action airbrush otherwise you will want to be looking at dual action. Single action airbrushes are just on and off the flow of paint is always the same (there are ways to change it but it requires you to swap parts out). Dual action actually lets you control the thickness of the paint (amount of paint) coming out of the airbrush with the movement of your finger. It comes down to on and off vs off on-low, on-medium, on-high, and everything in between.
Single Action vs. Dual Action - This one thing makes a big difference in what you are going to do with you airbrush. If you are going to base-coat things only then you can get a single action airbrush otherwise you will want to be looking at dual action. Single action airbrushes are just on and off the flow of paint is always the same (there are ways to change it but it requires you to swap parts out). Dual action actually lets you control the thickness of the paint (amount of paint) coming out of the airbrush with the movement of your finger. It comes down to on and off vs off on-low, on-medium, on-high, and everything in between.
Top Feed Vs. Bottom Feed - Bottom feed siphons the paint up through a tube into the airbrush using the airflow. This means that you can just pop on and off the cups your using for the paint and swap between colors and cleaner really quickly without really worrying about having to totally clean the brush however the siphon feed makes thicker paint harder to get through. Top feed actually uses gravity and the air to pull the paint through so its actually quite easier to get thicker paint though.
I have seen quite a few tutorials on airbrushing popping up all over the web lately and as a new airbrush user I figured I may have a few good thoughts to help people out. Next will be the rest of the equipment and some personal opinions after my experience with the airbrushes.
Wednesday, July 7, 2010
New Photo Box
So I saw someone post about a cool collapsible light diffusion box on 1dealaday.com and I ordered it. I figured that I could quickly post a photo of some miniatures. I painted the flamers a while back but since they are a metallic look its been quite hard to get good lighting on them and actually get a decent picture.
Sunday, July 4, 2010
A few pounds of metal
 So over the past week or so I have been getting boxes in the mail from the trades that I mention previously. Two big trades and a few small things later and I spent $370 and have a ton of metal.
So with all those minis as you can see in the second picture I also ordered some Dragon Forge bases, which I need more of, and started to build models. I actually have been going all out on these each model goes through the the following steps.
Clip off the Tab
Clean mold Lines
Flatten Feet
Clean any other "junk"
Make sure there are no "sharp" edges
Drill Pin Holes and Bolter
Pin the Feet Backpack etc.
Clean the Base
Wash Everything in Soapy Water
Glue together
Thursday, July 1, 2010
First Commision Terrain - Part 2
So last week I posted Part 1 of my commission job for my friend. Since that time I finished all 3 pieces of terrain, returned them, and picked up a second set of pieces that will be featured in part 3.
When we last looked I had primed all three ruins.
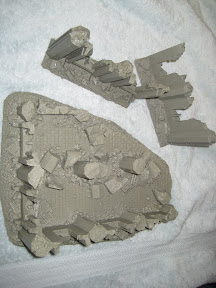
Now we start the painting.
The base is going to be a dark brown with some lighter highlights and a Grey wall with some details.
Basing
Scorched Brown
Badab Black
Graveyard Earth
Desert Yellow
Walls
Codex Grey
Black Ink
Badab Black
Fortress Grey
Camo Green
Details
Boltgun Metal
Blazing Orange
Scab Red
Snakebite Leather
Badab black
Thraka Green
Leviathan Purple
I used my airbrush to put on the base colors Scorched Brown for the ground and Codex Grey mixed with some Black Ink on the walls.
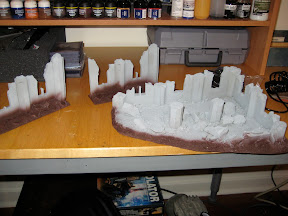
I picked out a few details with the airbrush and then drybrushed the ground with a nice thick layer of graveyard earth and then Desert Yellow. Followed by the Walls with Codex Grey and fortress Grey.
Then was the details I painted all the metal bits Boltgun Metal, dabbed some Blazing Orange and Scab Red. After a quick drybrush of Boltgun Metal, wash of Badab Black all those bits were taken care of. Using the airbrush made adding a few nice things like a mossy color, Camo Green thinned by Matt Medium, to some of the corners and pillars as well as using black ink thinned to show some discoloration from fire in places.
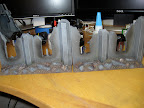
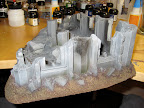

After all is said and done I am proud of everything but I feel as if once I learn to control the airbrush slightly better then I will acheve better results in the final stages of adding the "mossy" colors and "fire/explosion" damage effects. I am also considering looking into some of the powders but I may wait on that until I start tanks. Until then Part 3 will be coming soon with lots more pieces of terrain.
When we last looked I had primed all three ruins.
Now we start the painting.
The base is going to be a dark brown with some lighter highlights and a Grey wall with some details.
Basing
Scorched Brown
Badab Black
Graveyard Earth
Desert Yellow
Walls
Codex Grey
Black Ink
Badab Black
Fortress Grey
Camo Green
Details
Boltgun Metal
Blazing Orange
Scab Red
Snakebite Leather
Badab black
Thraka Green
Leviathan Purple
I used my airbrush to put on the base colors Scorched Brown for the ground and Codex Grey mixed with some Black Ink on the walls.
I picked out a few details with the airbrush and then drybrushed the ground with a nice thick layer of graveyard earth and then Desert Yellow. Followed by the Walls with Codex Grey and fortress Grey.
Then was the details I painted all the metal bits Boltgun Metal, dabbed some Blazing Orange and Scab Red. After a quick drybrush of Boltgun Metal, wash of Badab Black all those bits were taken care of. Using the airbrush made adding a few nice things like a mossy color, Camo Green thinned by Matt Medium, to some of the corners and pillars as well as using black ink thinned to show some discoloration from fire in places.
After all is said and done I am proud of everything but I feel as if once I learn to control the airbrush slightly better then I will acheve better results in the final stages of adding the "mossy" colors and "fire/explosion" damage effects. I am also considering looking into some of the powders but I may wait on that until I start tanks. Until then Part 3 will be coming soon with lots more pieces of terrain.
Labels:
40k,
forge world,
forgeworld,
painting,
ruins,
terrain
Subscribe to:
Posts (Atom)
